Principais vídeos


In this video, Pastor Billy Graham explains how to be optimist and overcome sins, temptations, and the devil’s power.
Jesus paid the penalty for our sins with his precious blood on the cross, and he offers us forgiveness and unmerited favor as a gift. We can walk straight in the midst of this world with the power of the Word of God and the power of the Holy Spirit living within us. We can look forward to Christ’s return, when evil will be destroyed, and we will experience universal joy, peace, and justice. Don’t let the world and its temptations keep you from the power of Christ!
Speaker:
Billy Graham
Other Videos You Might Love:
► Start Your Day with God | A New Day of Hope👇
https://youtu.be/eQVbyTy0jG0
► What is True Love? | Powerful Billy Graham Speech👇
https://youtu.be/NLTB_zBUK0Q
► 10 Minutes to Overcome All Your Worries👇
https://youtu.be/BThDjhewsa8
Our Main Playlists:
► Morning Inspiration👇
https://www.youtube.com/watch?v=eQVbyTy0jG0&list=PLI5JSuylibuGjCFTWQkrPKCb8kxAs9xPe
► Billy Graham Motivation👇
https://www.youtube.com/watch?v=NLTB_zBUK0Q&list=PLI5JSuylibuGJshi3lIiIdBLhTm_4VPtn
► God Can👇
https://www.youtube.com/watch?v=xQc3wITazUI&list=PLI5JSuylibuHW5NhgSfW-mtk1GKtqYahV
Music:
Music by Whitesand - Beautiful Instrumental Music - Secretum
https://www.youtube.com/watch?v=2gnOCQse0H8
Buy this Music: https://whitesand.bandcamp.com/
Footage Licensed Through Filmpac
Our goal is to inspire, motivate and empower believers in their journey with God.
#crossinspiration #inspire #encourage #motivation #inspiration #encouragement #Jesus #God #billygraham #billygrahammotivation #billygrahamsermon #billygrahamclassics #evil #overcomeadvrsty #overcomefailure #overcomedepression

Billy Graham Sermon | The Miracle of Easter: Reflections on Christ's Resurrection
▽ Follow 'Soul Nourishment'
►Subscribe: https://www.youtube.com/@Soulnourishment1/videos
Subscribe for a new video every day! Activate the 🔔 beside the subscribe button to get a notification! Leave us a comment with what you'd like to see in the next video!
© 2023 Soul Nourishment

Billy Graham Sermon | Life is Short: Live it to the Fullest
▽ Follow 'Soul Nourishment'
►Subscribe: https://www.youtube.com/@Soulnourishment1/videos
Subscribe for a new video every day! Activate the 🔔 beside the subscribe button to get a notification! Leave us a comment with what you'd like to see in the next video!
© 2023 Soul Nourishment


http://www.ted.com Speaking at TED in 1998, Rev. Billy Graham marvels at technology's power to improve lives and change the world -- but says the end of evil, suffering and death will come only after the world accepts Christ. A legendary talk from TED's archives.

Billy Graham Sermon | Rebel with a cause: The story of a young person's journey to faith
▽ Follow 'Soul Nourishment'
►Subscribe: https://www.youtube.com/@Soulnourishment1/videos
Subscribe for a new video every day! Activate the 🔔 beside the subscribe button to get a notification! Leave us a comment with what you'd like to see in the next video!
© 2023 Soul Nourishment

Powerful Message By Billy Graham ll Stop making excuses
Billy Graham message in hindi
Subscribe To New Channel (Brother Yakoob Live)
https://youtube.com/channel/UC....XWyw6bN51CEH9WaXD02e
Follow us on Instagram-
https://www.instagram.com/tell....thetruthyakoob_minis
subscribe
https://www.youtube.com/@tellthetruthyakoob
दो गवाह/Two Witnesses Hindi Full Movie https://youtu.be/VWu1VAwzHzg
______________________
वीडियो अगर अच्छा लगे तो इसे Like & Share जरुर करना, और ऐसे ही और मसीही विश्वास के ऊपर आधारित Videos देखने के लिए हमारे चैनल के साथ बने रहे और "Tell The Truth Yakoob" Channel को SUBSCRIBE जरूर करे God Bless you All
Final Thing That Must Happen Before Jesus Comes https://youtu.be/Xacjlu7YUZE
जैसा बाइबल में लिखा था सब वैसे ही हो रहा है l Hosea Prophecy Revealed https://youtu.be/bz8-YM4pKFs
Jonah Prophecy Revealed l 40 Days Mystery Unfolded https://youtu.be/ulMLr-xv4Ks
Mindblowing Prophetic Sign From Moses Story https://youtu.be/AQIh_XfEk1U
4 Facts About Second Coming of Jesus
https://youtu.be/ReRKM7yERHI
Message That Shook The Wolrd
https://youtu.be/c4FgMqeZU3g
--------------------------------
Note- NOTE: ALL THE IMAGES/PICTURES, VIDEOS, AND MUSIC SHOWN IN THE VIDEO BELONGS TO THE RESPECTED OWNERS AND NOT ME... I AM NOT THE OWNER OF ANY PICTURES SHOWED IN THE VIDEO
----------------------------------------------------------------
Copyright and 'fair use' disclaimer:
Copyright Disclaimer Under Section 107 of the Copyright Act 1976, allowance is made for "fair use" for purposes such as criticism, comment, news reporting, teaching, scholarship, and research. Fair use is a use permitted by copyright statute that might otherwise be infringing. Non-profit, educational or personal use tips the balance in the favor of fair use.
Our Purpose, when making Motivational and educational videos, is to make quality educational Motivational videos and share these with our viewers.
1》 This video has no negative impact on anyone.
2》This video is also used for Teaching/Motivational purposes.
3》This video is Transformative in Nature.
4》 I ONLY used bits and pieces of videos and photos to get the point across where Necessary.
On This Channel we help Our Christian Brethren to Know about their Faith and Walk accordingly and Warn them of The Disaster coming ahead.
We are not Here to Entertain the goats, we are here to Feed the Sheep of Christ..
We believe in Sola Scriptura, No Personal Revelation......
Email @ tellthetruthyakoob@gmail.com
#Billy_Graham_Hindi_Message
#Message_To_Believers
#tell_the_truth_yakoob
#BillyGrahamexcuses
#ExcusesHindiBillyGraham
#BillyGrahamHindiMessage
#BillyGrahamMessage
#BillyGrahamMessageHindi
#HindiMessagebyBillyGraham
#BillyGrahamHindiMessagenew
#TellTheTruthYakoobMinistry
#HindiChristianMotivational
#HindiChristianMotivationalVideo
#BiblicalMotivationHindi
#HindiMotivationChristianMessage
#MotivationChristianMessage
#biblicaltruthHindi
#biblequotesHindi
#EndTimesEventsHindi
#MessageforYoung
#YouthMessageHindi
#BrotherYakoobMessage
#hindichristianmotivationalMessage
#BibleVideoHindi
#JesusVideoHindi
#TellTheTruthYakoob
#ChristianMotivationHindi
#HindiChristianMotivational
#HindiBibleMessage
#HindiMessageBibleJesus
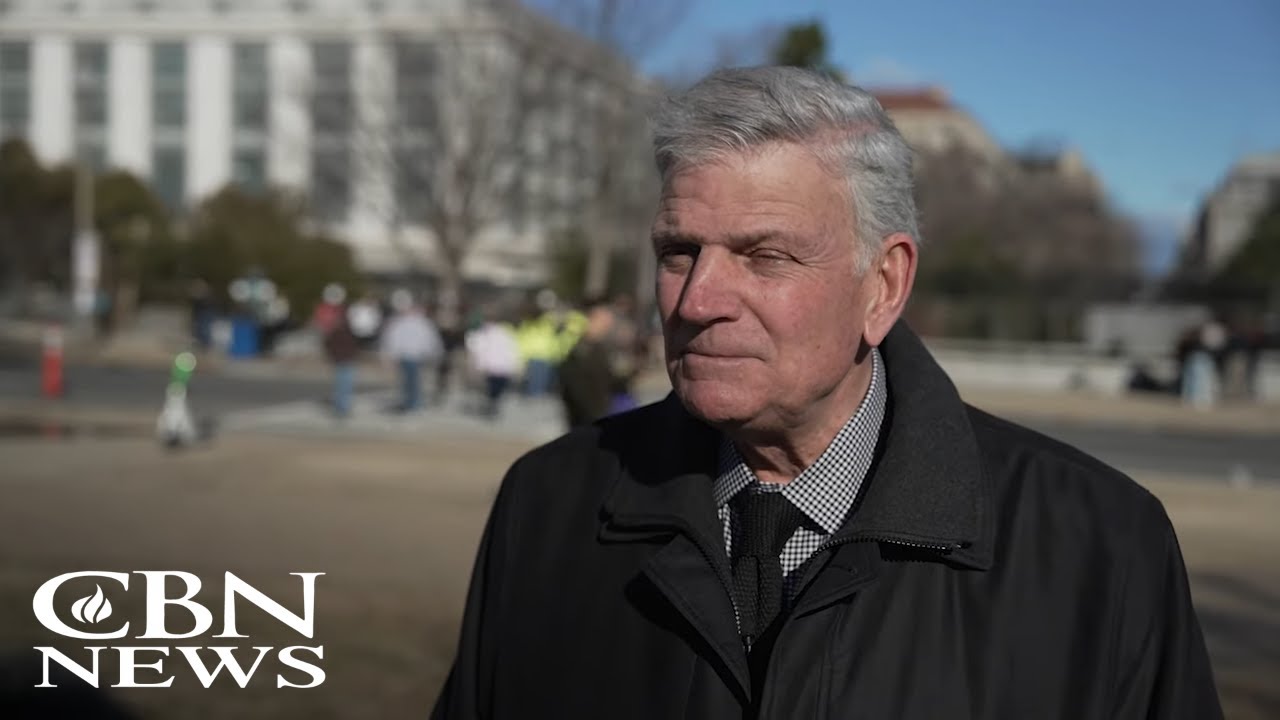
Evangelist Franklin Graham delivered powerful remarks before Friday’s 50th annual March For Life event, warning “judgment is coming” and urging Christians to “lift up” Jesus’ name to reach a lost world. Graham, who heads the Christian relief organization Samaritan’s Purse and the Billy Graham Evangelistic Association, told CBN’s Faithwire he’s read Scripture and knows where culture is headed. “I know where we’re going,” he said. “I’ve read Revelation. I know what’s getting ready to happen to this world. Judgment is coming.” Graham continued, “God is going to judge this earth with the rejection of His Son, and there’s gonna be a great price to pay.” Thus, the evangelist spoke about the importance of bringing God’s hope to a weary world, imploring believers to encourage repentance and a quest for personal forgiveness. “This is the time for people to repent and turn from their sins and believe on the name of the Lord Jesus Christ,” Graham said. “Jesus said, ‘I’m the way, the truth [and the] life. No man comes to the Father, but by me.’ There’s not multiple ways to God, only one.” Graham encouraged people to “make Christ known” and lift up His name, helping those who don’t know Jesus discover His profound love for them. “Without Christ, we have no hope,” he said.
Download the free CBN News App: http://cbnnews.com/app
SUBSCRIBE to the CBN News Channel for more:
http://youtube.com/c/CBNnewson....line/?sub_confirmati
SUBSCRIBE to the QuickStart Newsletter by visiting quickstart.news
SUBSCRIBE to the Quickstart Podcast. New episodes every morning at 7am: cbn.com/cbnnews/quickstart
What's coming up next? Have a look at our program guide: https://www.youtube.com/redirect?q=http%3A%2F%2Fwww1.cbn.com%2Fcbnnews%2Fnewschann&redir_token=3Xja-7LE5ZQebEu1fn-B5ib34tN8MTU3OTg4MjMzMkAxNTc5Nzk1OTMy&v=P0mHVeNNfDw&event=video_description
CBN features 24-hour TV news from a Christian perspective. The CBN News Channel provides independent news programming to an underserved audience to enlighten, entertain and inspire Christians around the world. Comments below do not necessarily reflect the views of CBN.
Share this live feed with your friends and family:
https://www.youtube.com/c/CBNnewsonline
Like us on Facebook: https://www.facebook.com/cbnnews/
Like us on Twitter: https://twitter.com/CBNNews
Follow us on Instagram: https://www.instagram.com/cbnnews/
Contact News Editors: https://www.youtube.com/redirect?q=https%3A%2F%2Fwww1.cbn.com%2Fcontact%2Fcontact-&redir_token=3Xja-7LE5ZQebEu1fn-B5ib34tN8MTU3OTg4MjMzMkAxNTc5Nzk1OTMy&v=P0mHVeNNfDw&event=video_description
Questions about other CBN programs: https://www.youtube.com/redirect?q=https%3A%2F%2Fwww1.cbn.com%2Fcontact%2Fcontact-&redir_token=3Xja-7LE5ZQebEu1fn-B5ib34tN8MTU3OTg4MjMzMkAxNTc5Nzk1OTMy&v=P0mHVeNNfDw&event=video_description
Questions about supporting CBN?
http://www1.cbn.com/cbn-partners (and) https://www.youtube.com/redirect?q=https%3A%2F%2Fsupport.google.com%2Fyoutube%2F%3Fp&redir_token=3Xja-7LE5ZQebEu1fn-B5ib34tN8MTU3OTg4MjMzMkAxNTc5Nzk1OTMy&v=P0mHVeNNfDw&event=video_description
Questions about Helping the Home Front? Call: 800-700-7000
https://www.youtube.com/redirect?q=https%3A%2F%2Fwww1.cbn.com%2F700club%2Fhelping-&redir_token=3Xja-7LE5ZQebEu1fn-B5ib34tN8MTU3OTg4MjMzMkAxNTc5Nzk1OTMy&v=P0mHVeNNfDw&event=video_description
#breakingnews #politicalnews #christiannews #christian #christianity #church #breakingnews #cbnnews

Franklin Graham was joined by former Vice President Mike Pence for a ribbon cutting ceremony at the Billy Graham library on Tuesday
For more Local News from WHNS: https://www.foxcarolina.com/
For more YouTube Content: https://www.youtube.com/channe....l/UCEm0gdukLIfI9P-Lz

Apostasy Report #14
Franklin Graham is America's evangelist.... or is he? While he has said and done many good things, his compromises are too many to overlook. In the interest of politics and honoring the name of his father, Billy Graham, many will be poised to dismiss what is undeniable. But Franklin Graham has habitually embraced and promoted false teachers and heretics. Despite a reputation for biblical adherence, he gives every indication that he is a hireling and an evangelist of compromise.
See: https://servuschristi.com/
Facebook: https://www.facebook.com/ServusChristiOfficial/
Francis Chan Apostasy: https://youtu.be/7UTHq3VGft4
Corrupt Christian Music: https://youtu.be/H9Gn4zK7VUs
Catholic Church Deception: https://youtu.be/QVmnawGFaVs
Jack Hibbs Compromise: https://youtu.be/VraAW8oi3Yg
May the Lord Jesus Christ be with you.


Begin your journey to peace with God at www.peacewithGod.org.uk.
Franklin Graham, son of the late Rev. Billy Graham, shared a message of hope in Blackpool in September 2018.
In this, the final night of the Festival of Hope, he preaches on the story of King Manasseh of Judah, one of the wickedest men to have ever lived.


► To support a grassroots movement made up of over 175,000 individuals who seeking to bring a Christian influence to politics. click here: https://bit.ly/3dVJpb1
►► Subscribe to watch more videos from Australian Christian Lobby here: https://bit.ly/2TyNTgb
►►► If you want to be involved with other volunteers, click here: https://bit.ly/2yiHwpM
►► ►► If you are interested in leadership development, click here: https://bit.ly/2ydsxxc
►► ►►► If you want to pray with us, click here: https://bit.ly/3fZets9
For more information about Australian Christian Lobby visit: https://bit.ly/2Zh7Nj6
FOLLOW US
►► Instagram: https://instagram.com/aclobby
►► Facebook: https://facebook.com/aclobby
►► Podcast: https://apple.co/2z9hKoh


On Friday's 'The Record with Greta Van Susteren', Samaritan's Purse President Franklin Graham praises former President Donald Trump for nominating Conservatives to the Supreme Court.
Watch Newsmax on Directv 349, Xfinity 1115, Dish 216, Spectrum (see channels), Cox, Optimum, U-Verse 1120, FiOS 615, Suddenlink, CenturyLink 1209, Mediacom 277, Fubo, Sling, WOW!, Armstrong, or the Newsmax smartphone APP.
Get the latest news, headlines and analysis at http://newsmax.com
Find your Newsmax cable/streaming provider here: https://newsmaxtv.com/findus
Like Newsmax on Facebook: http://nws.mx/FB
Follow Newsmax on Twitter: http://nws.mx/twitter
Follow Newsmax on Instagram: http://nws.mx/IG
Follow Newsmax on TRUTH Social: https://truthsocial.com/@NewsMax
Follow Newsmax on GETTR: https://gettr.com/user/newsmax
Newsmax's Cartoon of the Day: http://nws.mx/cartoons
Subscribe to Newsmax podcasts for free at http://newsmaxtv.com/podcasts
Shop Newsmax Logo Gear at http://nws.mx/shop
Listen to Newsmax anywhere on iHeart: https://www.iheart.com/live/newsmax-8856/


Reverend Franklin Graham said presidential candidate Mayor Pete Buttigieg should repent for being gay. The Reverend Dr. William Barber joins "All In" to tell us what he thinks Franklin Graham should be repenting for.
» Subscribe to MSNBC: http://on.msnbc.com/SubscribeTomsnbc
MSNBC delivers breaking news and in-depth analysis of the headlines, as well as informed perspectives. Find video clips and segments from The Rachel Maddow Show, Morning Joe, Hardball, All In, Last Word, 11th Hour, and more.
Connect with MSNBC Online
Visit msnbc.com: http://on.msnbc.com/Readmsnbc
Subscribe to MSNBC Newsletter: http://MSNBC.com/NewslettersYouTube
Find MSNBC on Facebook: http://on.msnbc.com/Likemsnbc
Follow MSNBC on Twitter: http://on.msnbc.com/Followmsnbc
Follow MSNBC on Instagram: http://on.msnbc.com/Instamsnbc
Pete Buttigieg Versus Franklin Graham | All In | MSNBC


We're back with more natural remedies and homeopathic cures for common health issues. Instructions below!
Visit KentRollins.com for our latest cookbook and tour dates.
#homeremedies #naturalremedy #cowboycooking
In this video:
Organic Beet Juice https://amzn.to/3IzjUx8
Rode wireless mic: https://amzn.to/2ShDyEq
For more suggested products seen in our videos click here: https://www.amazon.com/shop/cowboykentrollins
======================
Get all the recipes and instructions here: https://kentrollins.com/cowboy-cures-part-2/
======================
Check out our BEST SELLING cookbooks, A Taste of Cowboy and Faith, Family and the Feast. Get your copy here: https://www.kentrollins.com/shop
Also available at bookstores nationwide, and Amazon http://amzn.to/2uBl4EM
---------------------------------
Connect with us!
https://facebook.com/cowboykentrollins
https://instagram.com/cowboykentrollins
https://twitter.com/Kent_Rollins
---------------------------------
Kent Rollins
Cowboy Cooking, Cast Iron, Outdoor Cooking, Grilling, Dutch Oven Cooking
Note: Some of the above links are affiliate links, meaning at no additional cost to you, we may receive a commission for your click through and purchase.
