- Film & Animation
- Music
- Pets & Animals
- Sports
- Travel & Events
- Gaming
- People & Blogs
- Comedy
- Entertainment
- News & Politics
- How-to & Style
- Non-profits & Activism
- Religion & Spiritual
- Health Natural Remedies
- Gardening +
- Arts & Crafts
- Action
- Hair & Beauty
- Hunting & Survival
- Shopping & Reviews
- Motivational & Self Help
- Jesus
- Marriage
- Live TV
- Programing & Coding
- Latest & Gadgets
- Make You Own
- Unexplained & Stange
- Jesus Christ
- Food & More
- Other
How-to & Style
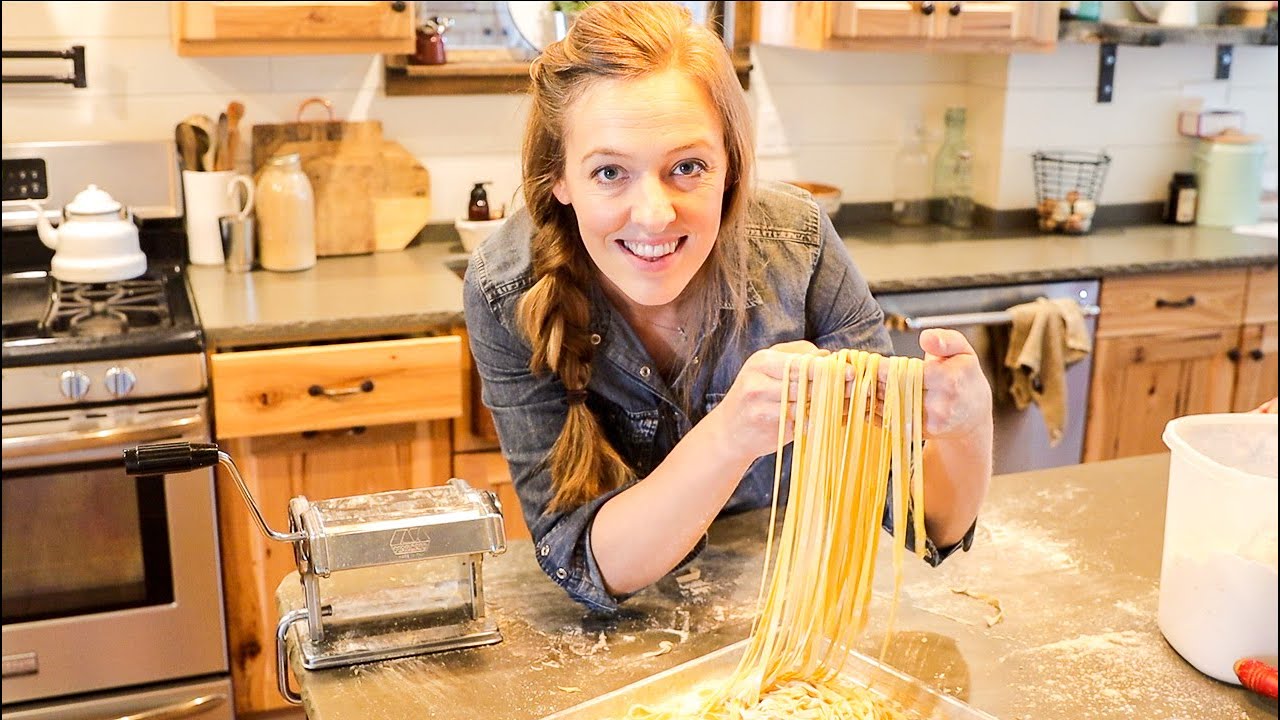

Learning how to make pasta at home is WAY easier than you think! Homemade pasta is a pantry staple you can make with THREE simple ingredients-- you're gonna love it! *CLICK SHOW MORE FOR RECIPE*
➡️➡️ GET MY COOKBOOK: www.homesteadcookbook.com
Get the full recipe & instructions: https://www.theprairiehomestea....d.com/2015/02/homema
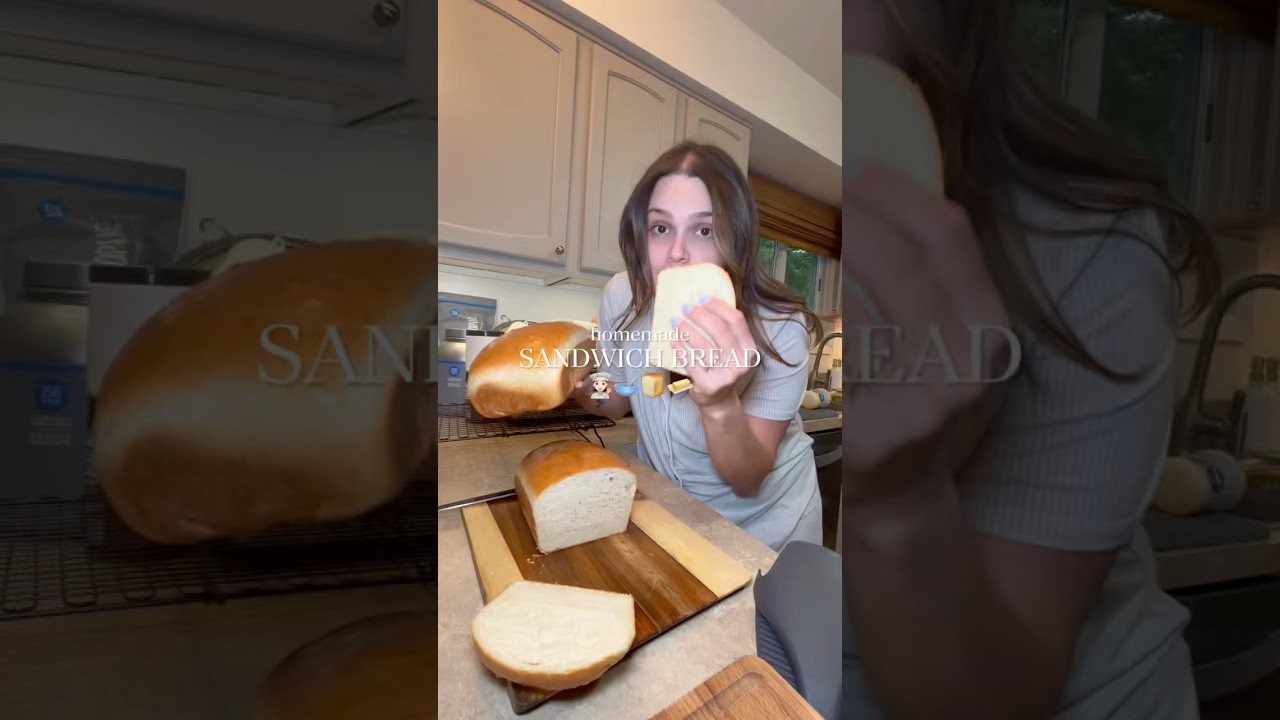
The Easiest Bread You'll Ever Make: https://www.youtube.com/watch?v=BsgUcpTLQww
NO-FUSS HOMEMADE PASTA
2 cups flour
1/2 teaspoon sea salt
3 large eggs
Combine the flour and salt.
Make a well in the center of the flour, and add the eggs.
Gently begin to mix the eggs, gradually drawing in flour with each stroke. Eventually a stiff dough will form.
Knead the pasta dough for 6-7 minutes.
If the dough is too dry and won’t stick together, add a 1/2 teaspoon of water. If it is too sticky, sprinkle in a bit more flour.
Keep in mind this dough will be much stiffer than your traditional bread doughs. However, the longer you work it, the smoother and more pliable it will become.
We are looking for a smooth, satiny consistency, which will begin to develop the more you knead.
Cover the well-kneaded dough tightly with plastic wrap, and allow it to rest for around 45 minutes. (This resting phase is super important, as it gives the dough time to relax. Otherwise, you’ll fight it the whole time you are rolling it out.)
After the resting period, divide the dough into four portions.
Pasta Machine Instructions:
Rolling the dough is a process– you need to make several passes, throughout each thickness setting for the best results. I start with the biggest setting (usually 5 or 6), run it through once or twice there, and then start gradually adjust the settings to be thinner and thinner until I have the perfect sheet of golden pasta.
Between each pass, I like to fold the strip into thirds. This helps square up the edges and keeps things even. Then simply roll it through the cutting side of the machine to slice into spaghetti or fettucine.
Rolling Pin Instructions:
If you don’t have a pasta machine, you can simply use a rolling pin and knife (or pizza cutter). Keep in mind you’ll want to roll it out as thin as humanly possible, as it will plump up considerably once you cook it.
Roll each portion of dough out on a well-flour surface and then cut into thin strips. Your noodles will be more rustic, but they’ll still taste amazing.
From here, you can either cook your pasta right away (3-4 minutes in boiling water) or dry it.
It also freezes well– just make sure you don’t throw it into the freezer in a big lump, because then you’ll end up with a pasta dumpling when you go to cook it.
Serve your perfect homemade pasta with homemade sauces, or olive oil, Parmesan, and fresh herbs.
🧢 We have Old-Fashioned on Purpose Gear! https://homesteadswag.com
🐓 LIVE OLD-FASHIONED ON PURPOSE:
+ The Prairie Homestead Cookbook: http://homesteadcookbook.com
+ Learn How to Cook Like a Homesteader: http://heritagecookingclass.com
+ Learn How to Can (Safely!): http://learnhowtocan.com/
🌎 OTHER PLACES WE HANG OUT:
+ The Old-Fashioned on Purpose Podcast: http://oldfashionedonpurpose.com
+ The Prairie Homestead Blog: http://theprairiehomestead.com
+ Follow Along on Instagram: http://instagram.com/theprairiehomestead


Amazon Store Front
https://www.amazon.com/shop/fr....anniejosavvysweet/li 3 Ingredient Homemade Southern Biscuits! Fluffy No Fuss No Fail!
2 cups self rising flour
1 stick of frozen unsalted butter
1 cup of cold buttermilk
Preheat oven to 450 degrees
bake for 15 at 18 minutes
#homemade
#easy-recipe
https://youtu.be/YuTANGP5m6Uht....tps://youtu.be/L13tQ
https://youtu.be/QsD_y1pNui4
https://youtu.be/5zyp-ym0_e0
Frannie Jo Savvy Sweets
PO Box 164
Beulaville NC 28518

ALL THE GEAR WE USE
↪︎ https://www.amazon.com/shop/steveskitchen Homemade Tomato Ketchup - Super easy to make and so delicious.
I thought it was time I updated this very popular recipe. Thanks to Mike and Vee for prompting me.
Written Recipe Visit our Blog
http://steves-kitchen.com/ketchup/
Share a Little Love BECOME a PATREON
https://www.patreon.com/SteveOwens
Thank you 😍 #ShareTheLove
ALL THE GEAR WE USE https://www.amazon.com/shop/steveskitchen
You Will Need
170g/6oz Tomato Paste
1/2 a cup of Hot Water
1/2 Teaspoon of Onion Powder
2 Tablespoons Brown Sugar
1/4 Teaspoon Mustard Powder
1/4 Teaspoon Cinnamon
1/4 Teaspoon Salt
Pinch of Clove
Pinch of All Spice
3 Tablespoons of White Vinegar
►LIKE, SHARE AND FOLLOW so you never miss a new video @StevesKitchen #ShareTheLove
http://steves-kitchen.com/affiliate-disclaimer/
*Say Hi! Here Too*
Facebook:
http://www.facebook.com/StevesKitchen
Instagram:
https://www.instagram.com/steveskitchen
Twitter:
https://twitter.com/Steves_Kitchen
Pinterest:
https://au.pinterest.com/steveskitchen
Google+:
https://plus.google.com/+Steves-Kitchen
The Official Website of ‘Steve’s Kitchen’
http://steves-kitchen.com
………………………………………………
Over 800 Recipes and Counting
https://www.youtube.com/StevesKitchen/videos
………………………………………………
Steve's Kitchen is sharing the love and having fun in the Kitchen on Youtube
MY GEAR STARTING WITH CAMERAS
Main Camera Canon http://amzn.to/2oD02Ox
Vlogging Camera http://amzn.to/2pbQyxU
Back up but really good all-rounder my M3 http://amzn.to/2pHmJFb
SOUND
Video Mic : http://amzn.to/2pNkNtf
Portable Sound Recorder http://amzn.to/2p5M6Aj
Main Sound Recorder http://amzn.to/2p5OUgw
Wireless Microphone http://amzn.to/2oybIHi
TRIPODS
The Best Vlogging Tripod Thing http://amzn.to/2pgtlHK
My preferred Tripod is a Monopod http://amzn.to/2q8lCN4
Music wanted!!!
If you are a music producer and would like me to use your music (any funky tunes and songs, love acoustics) please email me at socialmedia@steves-kitchen.com *
*
As an Amazon Associate, I earn from qualifying purchases.
🛒 Do you shop on Amazon?
If you buy things from Amazon save our custom link to your computer and use it whenever you shop. You won't pay a penny extra but we earn a small commission whenever you buy something.
USA - https://amzn.to/3iFHOZe
UK - https://amzn.to/31Os6nS
🎬 If you'd like to know what camera & sound gear we use to produce our Videos, you will find most of it here. Also for a full list of our world travel kit.
USA - https://amzn.to/3gYfOQ4
UK - https://amzn.to/3g0R0Wu

I am so excited share my homemade ketchup recipe that is sugar free! This idea got started when I noticed how expensive keto ketchup is at the store, and it turns out it is really easy to make sugar free homemade ketchup! It only costs $3.06 for 12 ounces of this paleo ketchup recipe, and the amount of effort is tiny! This homemade ketchup is paleo and keto approved, and all you need is some organic tomato paste and monk fruit, which I listed a link down below. Simmer the ketchup recipe for 45 minutes, blend it up, and you have homemade sugar free keto ketchup. I think we should do a homemade condiments series, what do you think!? Much Love..Bobby, Dessi, & Art XOXO
Order our new Keto Cookbook: https://amzn.to/2TOHWJL
RECIPE: https://www.flavcity.com/homemade-ketchup-recipe/
Macros per tablespoon of ketchup:
7.3 calories
1.26 grams of net carbs
1.49 grams of total carbs
0 fat
0.21 grams of protein
0.21 grams of fiber
Keto BBQ sauce recipe: https://www.flavcity.com/sugar-free-bbq-sauce/
Whole foods haul: https://youtu.be/IlNk6qBKgpM
Special sauce & keto shrimp burger: https://www.flavcity.com/shrim....p-burger-and-jicama-
Turkey meatloaf: https://www.flavcity.com/turke....y-meatloaf-meal-prep
Turkey burger: https://www.flavcity.com/low-fat-turkey-burger/
Cheese stuffed keto meatloaf: https://www.flavcity.com/low-c....arb-meatloaf-veggies
GET THE KITCHEN GEAR I USE:
the best can opener: http://amzn.to/2wKftfe
portable gas burner: http://amzn.to/2fewIww
monk fruit: https://amzn.to/2STkLAT
Sukrin gold brown sugar substitute: https://amzn.to/2EefMmc
hand stick blender: http://amzn.to/2xC9Ilr
spice canisters: http://amzn.to/2skAvgf or https://amzn.to/2Dr9Sii
my chef's knife: http://amzn.to/2gxYxOK
good cheaper chef's knife: http://amzn.to/2xfSF5n
oil splatter guard: https://amzn.to/2Mkb8Wj
microplane zester: http://amzn.to/2guLd1S
non-stick tongs: https://amzn.to/2JbrtKj
oil dispenser: http://amzn.to/2iTIfUL
my pepper mill: https://amzn.to/2q7VEuJ
wood cutting board: http://amzn.to/2tMkv9Z
the rest of my gear: https://www.amazon.com/shop/flavcity
New Videos Every Saturday Morning!
Follow Me On Social Media:
Facebook: https://www.facebook.com/flavcity
Instagram: https://www.instagram.com/flavcity
Twitter: https://www.twitter.com/flavcity
I'm out to prove that home cooks can be rock stars in the kitchen. I'm rocking the best healthy meal prep recipes on YouTube every Saturday morning!


Homemade Sauerkraut is a delicious, probiotic fermented food! And it is so easy to make with just 2 simple base ingredients. Let me show you how
_________ ⬇️⬇️⬇️⬇️ RECIPE BELOW ⬇️⬇️⬇️⬇️_________
PRINTABLE RECIPE: 🖨 https://leelalicious.com/homem....ade-sauerkraut-recip 🖨
INGREDIENTS:
• 1kg/2.2 lbs green or purple cabbage
• 20g/1 heaping tablespoon sea salt, kosher salt, Himalayan salt (not iodized table salt)
• 1 carrot (optional)
• 2 teaspoons caraway seeds (optional)
• additional fresh or dried herbs like dill (optional)
Thanks for watching! Please hit "LIKE," leave me a COMMENT below, and SUBSCRIBE!
You can also SHARE this video.
More fermentations videos:
Kombucha: https://youtu.be/WO0lVjnzwV8
Yogurt: https://youtu.be/Z4caRr8iMys
No-Knead Sourdough: https://youtu.be/aiwYed-lp5Y
BUY ME A COFFEE: https://www.buymeacoffee.com/leelalicious
SUBSCRIBE to my channel: https://www.youtube.com/leelal....icious?sub_confirmat
FACEBOOK: Leelalicious
INSTAGRAM: leelalicious
PINTEREST: Leelalicious
CONTACT ME: regina@leelalicious.com
SIGN UP FOR MY NEWSLETTER: https://leelalicious.com/newsletter


Watch more "Tasty 101" here! 👩🏫 → https://www.youtube.com/show/V....LPL8zglt-LDl-g6B-Vum
00:00 – The Secret to Parlor-Quality Ice Cream (Intro & Hook)
00:17 – A Brief History of Frozen Desserts (From Ancient Persia to Gelato)
01:12 – The Science of Perfect Ice Cream: Fat, Sugar, Water & Air
02:05 – Ice Cream Styles Explained: Custard vs. American vs. Gelato
03:04 – How To Use Stabilizers
04:05 – Choosing and Prepping the Best Ice Cream Flavors
05:04 – How To Make Malted Chocolate Marshmallow Ice Cream (Step-by-Step)
05:38 – Heating the Base & Why We Use Corn Syrup
05:53 – How To Stabilize with Cornstarch
06:44 – Bucket Churns vs. Compressor Models
08:02 – The Churning Process: Breaking Crystals and Adding Air
08:40 – How to Add Mix-ins
09:21 – Final Freezing Tips
10:07 – Outro: Creative Homemade Flavor Ideas
In this episode of Tasty 101, we’re showing you how to make rich, creamy homemade ice cream right in your own kitchen!🍨✨ Which flavor are you trying first?! 🍦😋
⭐️ Recipe → https://tasty.co/recipe/malted....-chocolate-marshmall
Watch "My State, My Plate" 🍽️ → https://www.youtube.com/watch?v=AUz037DlWIU&list=PL8zglt-LDl-h-_BqQmncustyxziDbKWPu
Watch "I Shop, You Cook" 🛒 → https://www.youtube.com/playli....st?list=PL8zglt-LDl-
Tasty defines how the internet cooks. Powered by the largest food audience in the world, we spot what’s next and turn it into recipes millions actually make. From viral food trends and challenges to back-to-basics cooking tips, we're the food destination for every cook. Subscribe here: @buzzfeedtasty
Find all our Tasty recipes and what's new on → https://tasty.co/
Download our Tasty App to save and follow along when cooking! → https://tasty.co/download?ct=yt_d
Credits:
Featuring: Raquel Alessi
Executive Producer: Brent Bennett
Producer: Joelle Park
Executive Culinary Producer: Kelly Paige
Culinary Producer: Jillian Cantwell
Recipe Editor, Tasty: Kimberley Wehby
Head of Tasty, Video: Brian Moreno
Line Producer: Vivian Miranda
Production Manager: Taiwo Ellis
Resourcing Solutions Manager: Daniel Watkins
Resourcing Solutions Supervisor: Derek Benig
Editor: Yagnesh Parmar
Director of Production Operations: Avery Kotzur
Manager of Post Production: Shoumyoroop Ghoshal
Post Production Supervisor: Jill Chipley
Post Production Coordinator: Chanin Russo
Post Production Coordinator: Sanaya Thadani
Post Production Coordinator: Tanaya Gore
Post Production Coordinator: Hiral Bhatt
Social Media Strategist: Lucy Kellison


⚠️⚠️IN THE VIDEO I SOMEHOW CUT OUT WHEN TO ADD THE GELATIN. YOU ADD IT AFTER THE CHEESE MELTS AND YOU LET THE GELATIN DISSOLVE. SORRY ABOUT THAT!⚠️⚠️
PRINTABLE RECIPE LINKS:
https://drive.google.com/file/....d/1p2q2kw10R5KWjHwV1
My New Channel (The Simple Life With Tammy): https://youtube.com/@TheSimple....LifeWithTammy?si=pOP
If you're looking for any of my kitchen gadgets, find them in my Amazon storefront:
https://www.amazon.com/shop/talesfromanemptynest
My mailing address:
Tammy L
P.O. Box 453
Greenwell Springs, LA 70739
EMAIL: talesfromanemptynest75@gmail.com
INSTAGRAM: https://www.instagram.com/tales_from_an_empty_nest
FACEBOOK: https://www.facebook.com/profi....le.php?id=6158752915
#homemade #velveeta #homemadecheese #cheese
I use EPIDEMIC SOUND for my music and sound effects, with paid subscription. Here's my link: https://share.epidemicsound.com/bcou9d
I edit with CYBERLINK POWERDIRECTOR 365: https://a.co/d/dUBSqnu
I use CANVA PRO for my thumbnails and channel art
Some links are affiliate links which means that I may receive a small commission with no additional cost to you.


🚀 Code:
https://github.com/langchain-ai/langchain-academy/
Tired of API bills and vendor lock-in? In this tutorial, you’ll learn how to adapt a LangGraph agent to run entirely locally using the free, open-source Qwen3 model with Ollama. We'll take a standard LangChain Academy example built for GPT-4o and show you how to swap it out for a powerful local alternative, giving you full control over your data and costs.
// WHAT YOU'LL LEARN
Setting up a Python development environment with UV, a blazingly fast package manager.
Installing and running powerful open-source models like Qwen3 locally with Ollama.
Building a conversational agent with memory using LangGraph's StateGraph.
Defining and binding tools (like a calculator) to your local LLM.
Adapting existing LangChain code from proprietary to open-source models.
Launching and interacting with your agent using LangGraph Studio.
Observing and debugging your agent's thought process with LangSmith.
Understanding the core components of an agentic graph: nodes, edges, and state.
// RESOURCES
LangChain Academy Course:
https://academy.langchain.com/
LangGraph Docs:
https://docs.langchain.com/oss..../python/langgraph/ov
Ollama & Qwen3 Model:
https://ollama.com/
https://ollama.com/library/qwen3
UV Package Manager:
https://github.com/astral-sh/uv
// CHAPTERS
00:00 - Intro: Moving Beyond Proprietary Models
01:03 - The Stack: LangGraph, Ollama, and UV
01:14 - Environment Setup with UV Package Manager
01:50 - Installing Ollama & Pulling the Qwen3 Model
04:01 - Creating a Virtual Environment & Project Dependencies
05:35 - Code Deep Dive: From OpenAI to Ollama
06:21 - Building the Agent Graph (Nodes & Edges)
11:00 - Configuring LangSmith for Tracing
12:12 - Running the Agent in LangGraph Studio
12:46 - Live Demo: Testing the Agent's Memory
13:56 - Recap & Next Steps
// NEXT STEPS
If this helped, give the video a like and subscribe! What should we build next with this local stack? Let me know in the comments below.
Discord: discord.gg/KpnJQbgpjt
#LangGraph #Ollama #LangChain #LocalLLM #OpenSourceAI #Qwen3 #Python #AIAgent #LangSmith #LLM #AI

We've been exploring local models for marimo lately and came to the conclusion that you can very much get a performance boost even if you don't resort to the large vendors. However, to really benefit most it might be most helpful to pivot your expectations and way of working slightly.
00:00 The case for local models
01:58 The setup
06:06 The prompt
07:15 The mistakes
09:15 The pattern
12:02 Conclusion
To learn more, check out these links:
https://ollama.com/
https://docs.marimo.io/guides/....editor_features/ai_c
