- Film & Animation
- Music
- Pets & Animals
- Sports
- Travel & Events
- Gaming
- People & Blogs
- Comedy
- Entertainment
- News & Politics
- How-to & Style
- Non-profits & Activism
- Religion & Spiritual
- Health Natural Remedies
- Gardening +
- Arts & Crafts
- Action
- Hair & Beauty
- Hunting & Survival
- Shopping & Reviews
- Motivational & Self Help
- Jesus
- Marriage
- Live TV
- Programing & Coding
- Latest & Gadgets
- Make You Own
- Unexplained & Stange
- Jesus Christ
- Food & More
- Other
Top videos


Hey guys!! Sorry I haven't been uploading as much! Now that we are staying at home and homeschooling, my focus has shifted to focus more on my kids and my family and make content whenever it is most convenient and easy for the flow of the family schedule. Thanks for understanding.
Today I'm making soaps with herbs harvested from my herb garden. I will do a garden update ASAP!
Soap Mold- https://amzn.to/362cmPC
Our Earths Secret Oatmeal Melt & Pour Soap Base- https://amzn.to/3dXLvaz
Our Earths Secret Olive Oil Melt & Pour Soap Base- https://amzn.to/2T2miU8
Lavender Essential Oil https://amzn.to/3dRQ5ah
Chamomile Essential Oil https://amzn.to/2WxWVvO
Dried Chamomile Flower https://amzn.to/3ctwQDs
Dried Lavender Buds https://amzn.to/2Wvs5Uk
♥MY MUSIC: https://spoti.fi/2MB4U8p
♥MY WEBSITE: http://www.racheltalbott.com
♥MY SHOP: http://www.PacificThyme.com/
♥INSTAGRAM: http://followgram.me/racheltalbott
♥MY PINTEREST: https://www.pinterest.com/racheltalbott/
♥HUBBYS COOKING CHANNEL: http://www.youtube.com/ByronTalbott
♥FACEBOOK: https://www.facebook.com/rachel.talbott
* DISCLAIMER: The opinions expressed are true &my own. I link affiliate links to make it easier for you to find the exact products I mention.....and... I LOVE YOU!!!! =) Thank you for supporting what I do!! ♥♥♥
THIS IS NOT A SPONSORED VIDEO So excited to share my new Pacific Thyme CBD Bath Bombs. Visit PacificThyme.com to get yours and keep an eye out for more great products soon!

Harmonic Arts Botanical Dispensary Co-Founder and Master Herbalist Yarrow Willard describes the difference between tea infusions and decoctions, and shows you the best way to make both.
Learn More at www.harmonicarts.ca
What is an Herbal Decoction?
A Decoction is a herbal tea that is lightly simmered for 30 minutes-5 hours. It is different from an Infusion, which is a tea that is steeped in hot water, but not simmered. Typically decoctions are done with woody plant parts like roots, barks, seeds and berries as well as mushrooms, where the medicinal compounds require longer extraction as they are contained by tough fibrous cell walls. They are not ideal for leafy green herbs or those containing highly volatile oils. These types of herbs are better made into Infusions. The strength of a decoction is based on how long they are brewed for and how much herb material is added. Most are typically done with 20 parts water (ml) to 1 part herb (grams), 20:1 . To make stronger this can be reduced as low as 5:1 before you start having more herb than liquid. When making a decoction, it is also important to use the best water you can get (spring water is ideal).
As it can take up to a few hours to make a strong decoction, sometimes it is ideal to make more then you are able to use right away. After straining, they can be stored in mason jars or other glass container in the fridge and reheated or used cold when desired. Most will last for up to a week, so keep this in mind, so as not to make more then you can use, unless you plan to freeze or can some of it.
How do we use decoctions?
Once created, a decoction can be used in many ways other than drinking as a tea, they also make a great base for other projects. One of my favourite options is to make a hot tonic drink. This can be done by adding super food powders like Raw Cacao or our Super Power Blend, a nut mylk, coconut oil or cacao butter and sweetener to the base and blending while still hot, like an amped up hot chocolate. Another option is to use it cold, as a smoothie base or a base for making your own nut mylks.
Decoctions also make a great base for a tonic Immunity soups, becoming the broth. Some are used externally for skin conditions by applying with a dampened cloth or sponge. They can be added to a bath or used as a traditional steam bath, surrounding the area with a towel to keep the steam in. To preserve a decoction, sweetener and alcohol can be added making a syrup or just alcohol making a tincture.
Subscribe:
http://www.youtube.com/subscription_c...
Herbs of choice:
Like I said before, the best choice of herbs are those with tough fibrous cell walls, like roots, barks, seeds, berries and mushrooms.
Harmonic Arts Tea Blends that lend well to decoctions:
Adapting Gems: http://harmonicarts.ca/product/adapti...
Tonic Immuni-tea: http://harmonicarts.ca/product/tonic-...
Organic Chai Blend: http://harmonicarts.ca/product/organi...
Throat Harmony: http://harmonicarts.ca/product/throat...
Coastal Roots: http://harmonicarts.ca/product/coasta...
Adaptogenic Tonic Herbs- Chaga, Reishi, Astragulus, Ginseng, Eleuthero, Ashwagandha, Fo-Ti, Rhemmania, Codonopsis, Wild Yam, Goji, Maca, Licorice, Suma, Devils Club, Sarsaparilla
Immune Herbs- Chaga, Reishi, Astragulus, Goji, Echenacea, Elder Berry, Codonopsis, Wild Cherry Bark, Lomatium, Wild Indgo, Osha
Digestive Support- Fennel, Licorice, Fenugreek, Slippery Elm, Marshmallow, Ginger, Gentian, Burdock
Liver Herbs- Burdock, Dandelion, Milk Thistle, Artichoke, Black Radish, Oregon Grape, Yellow Dock, Turkey Tail, Maitake
Reproductive Support- Dong Quai, Vitex, Cramp Bark, Fo-Ti, Rhemmania, Wild Yam, Maca, Muria Puama, Catuaba, Ginger
Circulation and Blood- Ginger, Cinnamon, Clove, Cardamom, Chai Spices, Hawthorn, Turmeric, Garlic, Cayenne
Pain- Willow Bark, Jamaican Dogwood, Cramp Bark, Ginger, Poplar Buds, San Qi
Seaweeds- Bladderwrack, Kelp, Wakame (Harmonic Arts Fucoidan Blend)
All the Herbs mentioned above are available at Harmonic Arts Botanical Dispensary
If you are using a small cut of herb they are ideally brewed loose and strained out, but can also be put in a re-usable muslin tea bag*, cheese cloth pouch or should be strained out before adding other vegetables. Another option is to add herbal powders and not filter them, although this will leave some sediment in the soup.
Harmonic Arts Blog: http://bit.ly/1q3me4d
Instagram: http://instagram.com/harmonic_arts
Facebook: http://facebook.com/harmonicarts
Pinterest: http://pinterest.com/harmonicarts
Twitter: http://twitter.com/harmonic_arts
Filming and editing by Shane Philip: http://youtube.com/shanephilipmusic
Website: http://shanephilip.com
Facebook: https://facebook.com/ShanePhilipMusic https://www.youtube.com/watch?
v=8eZMmZmrnnY&list=PLK38vasBbkM9asB29Xv7puHBreCiHEnhT&index=2

How to find the Chemist in DMZ and unlock the M13B! This is the only way to get the M13B in Warzone 2 and Modern Warfare. We show the best and most effect method to unlock the M13B DLC AR weapon in Call of duty Modern Warfare 2!
📱DISCORD https://discord.gg/3yW5n8EY3m 📱
🍌MERCH: https://unlockedstore-shop.fourthwall.com 🍌
🐦Twitter: https://twitter.com/Legounlocked 🐦
💎Facebook: https://www.facebook.com/gaming/LegoUnlocked 💎
🩸 2nd: https://www.youtube.com/channe....l/UCDgGg_FCzNIDPUu51 🩸
💜Twitch: http://www.twitch.tv/legounlocked 💜
🍌Join this channel to get access to perks:🍌
https://www.youtube.com/channe....l/UCJffBkLaEjsL_f21k
💎Thanks to @HellZ_HBN for the thumbnail and graphics help💎
✅ Setup: (Paid links) ✅
MAIN MONITOR: https://amzn.to/3aakXns
MAIN MONITOR #2: https://amzn.to/343mx6Z
SIDE MONITORS: https://amzn.to/3oN4eLl
MONITOR MOUNT: https://amzn.to/378eh7y
STREAM DECK: https://amzn.to/3gKSYMz
CHAIR MOD: https://amzn.to/37XfnCi
ROUTER: https://amzn.to/38aH0bp
PHONE: https://amzn.to/3neLvYz
MIC: https://amzn.to/37eGdXH
PC RGB FANS: https://amzn.to/3ncofKT
MIC STAND: https://amzn.to/2KhOK2G
GPU: https://amzn.to/3qNaB2X
HEADSET: https://amzn.to/2W33PYR
CPU: https://amzn.to/2KcntPk
DESK: https://amzn.to/3a39Nks (No longer make my desk but this is pretty close)
MOUSE PAD: https://amzn.to/2KhRRro
RAM: https://amzn.to/381uiM2
LAPTOP: https://amzn.to/37awTUI
PC CABLES: https://amzn.to/378I4Nj
WEBCAM: https://amzn.to/3mf4oZX
BACKGROUND LIGHTS: https://amzn.to/3oCJh5w
BOOT DRIVE: https://amzn.to/376kNvE
SSD: https://amzn.to/3ma2g5O
CAPTURE CARD: https://amzn.to/344v61m
COLD WAR: https://amzn.to/37aeSFR
MOUSE: https://amzn.to/3a37LRm
KEYBOARD: https://amzn.to/2JNszlr
00:00 How to Unlock the M13B In MW2 and Warzone 2
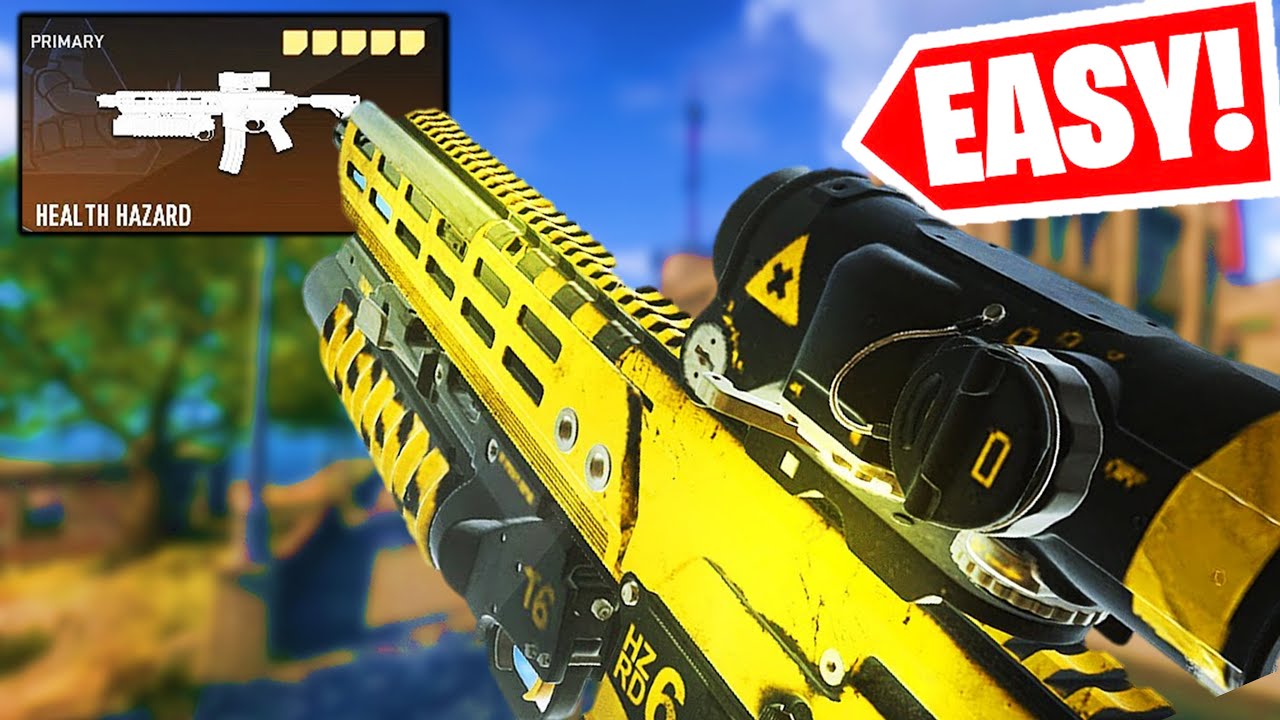
This is the best way to unlock the m13 in warzone 2, MW2 and DMZ! A lot of people have asked how to unlock the m13 in warzone 2 and modern warfare 2, and this video breaks it down. So you can unlock the m13 easy in warzone. You can kill the chemist and pick up the M13B blueprint easily in DMZ with this method. So get the m13 fast! You can also use this method to unlock the m13b in solo.
💚💚💚💚💚💚
►Become a member and join this channel to play Warzone with me and get access to other perks:
https://www.youtube.com/channe....l/UCJHnNuArb_6CdNfc2
► One-off donations are also welcome to help me keep creating content! paypal.me/Springleaf
Socials
► Twitter: https://twitter.com/thatsSpringleaf
► Discord: https://discord.gg/8VEBadcnfM
► TikTok: https://tiktok.com/@thatsspringleaf?lang=en
💚💚💚💚💚💚

Warzone 2 DMZ HOW TO GET ALL KEYS Locations Open Secret Rooms and HOW KEYS WORK - BEST Loot Items. Get all the Warzone 2 DMZ keys to open up secret rooms, locked area, locked boxes and much more.
Call of Duty®: Modern Warfare® II drops players into an unprecedented global conflict that features the return of the iconic Operators of Task Force 141. From small-scale, high-stakes infiltration tactical ops to highly classified missions, players will deploy alongside friends in a truly immersive experience.
Infinity Ward brings fans state-of-the-art gameplay, with all-new gun handling, advanced AI system, a new Gunsmith and a suite of other gameplay and graphical innovations that elevate the franchise to new heights.
Modern Warfare® II will launch with a globe-trotting single-player campaign, immersive Multiplayer combat and a narrative-driven, co-op Special Ops experience.
══════════ Support ════════
☕ | JOIN & Get Special Member Perks | https://www.youtube.com/channe....l/UC5kbCDveYQUcxoOll
🔔 | LIKE & SUBSCRIBE | https://bit.ly/38fvVqN |
💰 | DONATE & SUPPORT ME | https://bit.ly/2Mvuhsx
══════════ Social ══════════
➥ Twitter: https://twitter.com/gflaserbolt
➥ Facebook: https://www.facebook.com/gflaserbolt
➥ Discord: https://discord.gg/laserbolt
➥ Merch: https://teespring.com/stores/laserbolt
➥TikTok: https://vm.tiktok.com/TjDxuR/
➥ Instagram: https://instagram.com/gflaserbolt/
➥ Donations: ➨ https://goo.gl/GWBkgY
➥ KontrolFreek's 10% Off "GFLaserBolt": https://goo.gl/SxbTlL
══════ More MW2 Warzone 2 ══════
🎬 | MW2 Fastest Weapon XP Methods - DMZ - https://youtu.be/2Kv5iWbv85I
🎬 | MW2 Raids - https://youtu.be/PBgPhB8NC9w
🎬 | MW2 Battle Pass Explained - https://youtu.be/LkP8y6sRaus
🎬 | Warzone 2 Fastest Way to Get Tokens - https://youtu.be/1jXh0W7OadY
🎬 | Warzone 2 How to Level Up Guns - https://youtu.be/l0W7b1piEZ4
🎬 | Warzone 2 FREE PENDULUM BLUEPRINT - https://youtu.be/aNjZx_iGD5Y
🎬 | Warzone 2 Secret Phantoms Call Blueprint - https://youtu.be/081ir1RlOd0
🎬 | Warzone 2 Best PC Settings - https://youtu.be/gBonHpUcfeU
🎬 | Warzone 2 Unlock 7 Free Items (Blueprints) - https://youtu.be/y_BmjwoYuvA
🎬 | Unlock All Blueprints - https://youtu.be/yhymEFtABZs
🎬 | Fre Anomymous skin - https://youtu.be/GoxYwfWY_Cg
═════════ Timestamps ════════
═════════ Video Tags ════════
let's dive into mw2 battle pass, modern warfare 2 battle pass,2,call of duty modern warfare 2 battle pass, modern warfare 2,cod,destiny 2 raids,destiny 2 mw2,destiny 2 new raids,modern warfare 2 raids,modern warfare 2 info,modern warfare 2 details,laserbolt,destiny 2 lightfall raids,gaming news,cod news,new cod,modern warfare 2 gameplay,modern warfare 2 gameplay multiplayer,mw 2 raids,mw2 raids, modern warfare 2 dmz, call of duty dmz, m13b, mw2 m13b,battle pass tokens,modern warfare 2 battle tokens, warzone 2 xp,warzone 2 xp weapon,warzone 2 weapon xp,warzone 2 how to level up weapons
═════════ Hashtags ═════════
| #laserbolt | #mw2 #warzone2

Building 21 Access Key Explained! (DMZ Building 21 Access Key Farm Guide MW2)
Season 1 reloaded and talked a TON about Building 21. These are all the keys needed for DMZ Building 21 and how to farm them fast. Where is Building 21 and how do you access it?
📱DISCORD https://discord.gg/3yW5n8EY3m 📱
🍌MERCH: https://unlockedstore-shop.fourthwall.com 🍌
🐦Twitter: https://twitter.com/Legounlocked 🐦
💎Facebook: https://www.facebook.com/gaming/LegoUnlocked 💎
🩸 2nd: https://www.youtube.com/channe....l/UCDgGg_FCzNIDPUu51 🩸
💜Twitch: http://www.twitch.tv/legounlocked 💜
🍌Join this channel to get access to perks:🍌
https://www.youtube.com/channe....l/UCJffBkLaEjsL_f21k
💎Thanks to @HellZ_HBN for the thumbnail and graphics help💎
✅ Setup: (Paid links) ✅
MAIN MONITOR: https://amzn.to/3aakXns
MAIN MONITOR #2: https://amzn.to/343mx6Z
SIDE MONITORS: https://amzn.to/3oN4eLl
MONITOR MOUNT: https://amzn.to/378eh7y
STREAM DECK: https://amzn.to/3gKSYMz
CHAIR MOD: https://amzn.to/37XfnCi
ROUTER: https://amzn.to/38aH0bp
PHONE: https://amzn.to/3neLvYz
MIC: https://amzn.to/37eGdXH
PC RGB FANS: https://amzn.to/3ncofKT
MIC STAND: https://amzn.to/2KhOK2G
GPU: https://amzn.to/3qNaB2X
HEADSET: https://amzn.to/2W33PYR
CPU: https://amzn.to/2KcntPk
DESK: https://amzn.to/3a39Nks (No longer make my desk but this is pretty close)
MOUSE PAD: https://amzn.to/2KhRRro
RAM: https://amzn.to/381uiM2
LAPTOP: https://amzn.to/37awTUI
PC CABLES: https://amzn.to/378I4Nj
WEBCAM: https://amzn.to/3mf4oZX
BACKGROUND LIGHTS: https://amzn.to/3oCJh5w
BOOT DRIVE: https://amzn.to/376kNvE
SSD: https://amzn.to/3ma2g5O
CAPTURE CARD: https://amzn.to/344v61m
COLD WAR: https://amzn.to/37aeSFR
MOUSE: https://amzn.to/3a37LRm
KEYBOARD: https://amzn.to/2JNszlr
00:00 Building 21 Access Key Explained! (DMZ Building 21 Access Key Farm Guide MW2)

The enemy teams won't even know your there!
If you have enjoyed this video be sure to hit that LIKE & SUBSCRIBE button!
PARTNERS
🪑 Flexispot - https://flexispot.co.uk/
🖥 Xidax PC's - Xidax.com/TripleG
💻 AMD - https://www.amd.com/en/shop/
💈Beard Oils - http://brawbeardoils.com/ 'CODE TRIPLEG'
FOLLOW ME EVERYWHERE!
💜 Twitch https://www.twitch.tv/triple_g
👾 Discord - https://discord.com/invite/X9vtmKN
🐣 Twitter @Triple_Gz1
#TripleG #warzone #dmz

Have the Bomb Makers Supply Cache Key in Warzone 2.0/DMZ Season 2? This guide shows you where it is, as well as how to use it. It's super simple!
::: DMZ Key Locations :::
View all the DMZ Key locations in this playlist: https://www.youtube.com/playli....st?list=PLHJwC0YxbG3
- Ashika (Season 2): https://www.youtube.com/playli....st?list=PLHJwC0YxbG3
::: DMZ Missions (Season 2 - Ashika) :::
- ASHIKA Legion Missions: https://www.youtube.com/playli....st?list=PLHJwC0YxbG3
- ASHIKA White Lotus Missions: https://www.youtube.com/playli....st?list=PLHJwC0YxbG3
- ASHIKA Black Mous Missions: https://www.youtube.com/playli....st?list=PLHJwC0YxbG3
- ALL DMZ ASHIKA MISSIONS: https://www.youtube.com/playli....st?list=PLHJwC0YxbG3
::: DMZ Dead Drop Locations :::
- https://www.youtube.com/playli....st?list=PLHJwC0YxbG3
ALL DMZ SEASON 2 (ASHIKA) VIDEOS: https://www.youtube.com/playli....st?list=PLHJwC0YxbG3
Subscribe to https://youtube.com/TroubleChute for more in-depth videos! This is my "Everything else" channel. There are NO stupid questions, only more simple ones. That's what this channel, TroubleChute Basics, targets - Leaving nobody in the dark.
#DMZ #Key #Location
-----------------------------
💸 Found this useful? Help me make more! Support me by becoming a member: https://youtube.com/channel/UC....kih2oVTbXPEpVwE-U7km
-----------------------------
💸 Direct donations via Ko-Fi: https://ko-fi.com/TechNobo
💬 Discuss video & Suggest (Discord): https://s.tcno.co/Discord
🎮 Gaming channel: https://www.YouTube.com/TechNobo
🌐 Website: https://tcno.co
📧 Need voice overs done? Business query? Contact my business email: TroubleChute (at) tcno.co
Everything in this video is my personal opinion and experience, and should not be considered professional advice. Always do your own research and make sure what you're doing is safe.

Have the Clock Repair Tools Key in Warzone 2.0/DMZ? This guide shows you where it is, as well as how to use it. It's super simple!
--- DMZ Key Locations ---
View all the DMZ Key locations in this playlist: https://www.youtube.com/playli....st?list=PLHJwC0YxbG3
-- DMZ Missions ---
- Legion Missions: https://www.youtube.com/playli....st?list=PLHJwC0YxbG3
- White Lotus Missions: https://www.youtube.com/playli....st?list=PLHJwC0YxbG3
- Black Mous: https://www.youtube.com/playli....st?list=PLHJwC0YxbG3
- ALL DMZ MISSIONS: https://www.youtube.com/playli....st?list=PLHJwC0YxbG3
--- DMZ Dead Drop Locations ---
- https://www.youtube.com/playli....st?list=PLHJwC0YxbG3
Subscribe to https://youtube.com/TroubleChute for more in-depth videos! This is my "Everything else" channel. There are NO stupid questions, only more simple ones. That's what this channel, TroubleChute Basics, targets - Leaving nobody in the dark.
#DMZ #Key #Location
-----------------------------
💸 Found this useful? Help me make more! Support me by becoming a member: https://youtube.com/channel/UC....kih2oVTbXPEpVwE-U7km
-----------------------------
💸 Direct donations via Ko-Fi: https://ko-fi.com/TechNobo
💬 Discuss video & Suggest (Discord): https://s.tcno.co/Discord
🎮 Gaming channel: https://www.YouTube.com/TechNobo
🌐 Website: https://tcno.co
📧 Need voice overs done? Business query? Contact my business email: TroubleChute (at) tcno.co
Everything in this video is my personal opinion and experience, and should not be considered professional advice. Always do your own research and make sure what you're doing is safe.

Friends, my name is Paul! I am the author of the channel Performer of ideas.
On this channel, I present everything I've done with my hands.
Creative ideas, useful tips!
We turn simple things into unique ones! Subscribe, it will be interesting!
Lowest price tools with free shipping that I use:
Electric stapler (can hammer - staples, nails) http://alii.pub/68d2gx
Band saw for metal http://alii.pub/64k9kx
Cordless Reciprocating Saw http://alii.pub/5ya5vs
Cordless Brushless Bulgarian http://alii.pub/5ya60n, http://ali.pub/4mxfwe
Cordless WRENCH http://alii.pub/5ya63y
Cordless PUNCH http://alii.pub/5ya688
Semi-automatic welding machine 3 in 1, cooks without gas, forgot about slag and electrodes http://ali.pub/59ocb3
Reliable, high-quality screwdriver, for a penny http://ali.pub/4jnfsh
Welding (inverter) lowest price http://ali.pub/4jnjp9 , http://ali.pub/4jnjvh
Great cheap electric jigsaw http://ali.pub/4jngpq
#DIY #Homemade #Craft

Dr Jones' Free Book- http://www.veterinarysecrets.com
Dr Jones shows you a 'vet approved' homemade Dog Food Recipe, great for dogs with digestive issues.
Ingredients:
3 lbs of Lean Ground Beef
6 eggs
3 cups Swiss Chard (defrosted/cooked)
3 cups Brown Rice (cooked)
3 tablespoons Sunflower Oil
1 tablespoon of Calcium Carbonate (eggs shells)- 3500mg
Ground Flax Seed- 3 tablespoons
Dr Jones' ULTIMATE Omega 3 - One 500mg tab of Krill/day
http://www.theomega3supplement.com
Dr Jones' ULTIMATE Canine ADVANCED Health Formula- 1/2 scoop
http://www.thedogsupplement.com/advanced
Share this video and subscribe (it's free!) for more videos every Tuesday and Friday! http://goo.gl/P8nNvh
Thank you for making me the #1 Natural Pet Health Network on YouTube!
Follow Veterinary Secrets:
Blog: http://www.veterinarysecrets.com/blog
Podcast: http://vetsecrets.podbean.com/
Facebook: https://www.facebook.com/onlinevet
Instagram! http://instagram.com/veterinarysecrets
Twitter: http://www.twitter.com/dogandcatdoc
Pinterest: https://www.pinterest.ca/andrewjonesdvm/
TikTok: https://www.tiktok.com/@veterinarysecrets
Music from Uppbeat (free for Creators!):
https://uppbeat.io/t/zimpzon/calm
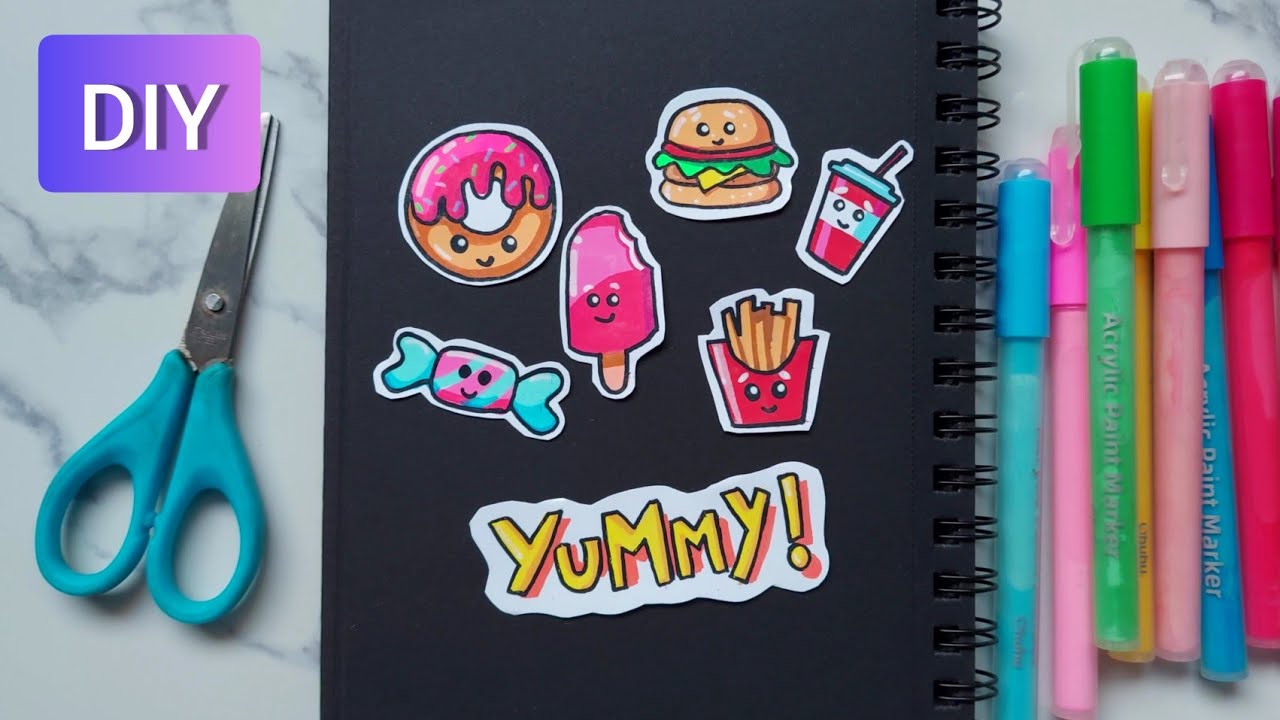
How to make homemade stickers ✨
My Instagram - https://www.instagram.com/aryanverma_001/
🖌️ Materials
• Acrylic markers - https://amzn.to/3X8gmIB
• Ohuhu sketch pad - https://amzn.to/3t6Cmqd
ohuhu markers review
how to use ohuhu markers
ohuhu markers drawing
drawing with ohuhu markers
Aryan Verma studios
how to blend ohuhu markers
drawing with acrylic marker
ohuhu acrylic marker
homemade stickers
how to make stickers at home
diy stickers
sketch pen drawing
posca markers
easy drawing ideas
#shorts #art #artist #drawing


N-Acetyl Cysteine: http://bit.ly/2MwBtnO
The AMAZING Health Benefits of NAC ( N-Acetyl Cysteine) is a video that looks at how you can benefits many ways by using n acetylcysteine. Whether you are looking to improve your lung health or decrease inflammation, nac has your back. n acetylcysteine benefits are proven by science and should be investigated by anyone who is trying to improve their health naturally.
👉 Watch Next: The Amazing Health Benefits of Quercetin: https://youtu.be/kxUT46pM4uE
✳ The Amazing Health Benefits Of Apple Cider Vinegar: https://youtu.be/J4Rmx7iy_VY
🆘 🙏 Become A Supporter & Join The Wellness Warrior Membership Community: https://bit.ly/3CjXhrl
✳ The Amazing Health Benefits of One Meal A Day (OMAD): https://youtu.be/DnwnkkuoMCY
✳ The Amazing Health Benefits Series: https://youtube.com/playlist?l....ist=PLE8KvEv74FLdx-q
------------------------------------------------
Quercetin: https://bit.ly/3wHwLH4
Vitamin D3 + K2: http://bit.ly/2TCdjY5
Vitamin C: https://bit.ly/3yyT41h
Zinc: https://bit.ly/2wJZ7Gk
Daily Immune Packets: https://bit.ly/3pSI8al
Follow me :)
Instagram | http://instagram.com/dr.nick.zyrowski
Blog | http://www.nuvisionexcel.com
Facebook | http://www.facebook.com/NuVisionExcel
I wanna hear from you!
Shipping Adress
48864 Romeo Plank
Macomb Mi, 48044
Disclaimer: Dr. Nick Zyrowski D.C, B.S is licensed and has a clinical practice in the state of Michigan. All information shared by Dr. Zyrowski is for general information purposes only and is not to be used to treat, diagnose or self diagnosis at any time. Dr. Zyrowski's use of the term doctor when referring to himself is simply referring to his degree and licensing. There is no doctor patient relationship between you and Dr. Zyrowski. You should seek advice from your health care practitioner before changing anything in the way of your dietary, nutritional or health regiment. You should always seek advice from your qualified health care physician regarding any health condition. NuVision Excel, NuVision Health Center, Dr. Nick Zyrowski and Dr. Zyrowski are not liable or responsible for any advice, course of treatment, diagnosis or any other information, services or product you obtain through this video or site.
#amazinghealthbenefits #drnickzyrowski #wellnesswarrior #weightloss #doctor #holisticdoctor #realdoctor #nutrition #healthandwellness #naturaldoctor


🔴 Title: CREATURES: BLOODTHIRSTYS
🔴 Summary: A group of astronomy students get more than they bargained for after finding an injured alien who is being targeted by a group of bloodthirsty CREATURES!. #horror #horrormovies
YOP 2021
Cast: Romain Barbey, Rina Saito, Chris K
Director: Tony Jopia
Writer: Andrew Fawn, Stu Jopia, Tony Jopia
🔴 Certificate: 16 (reedit safe)
🔴 Partner rating: S V F
👉 SUPPORTING our channel monthly starting at 1,99 $. Get extra videos and hugs. Cancel anytime.
👉 Check our Horror Merch Store: https://teespring.com/stores/watch-movies-now
Will you become a exclusive member and sponsor of my channel! Are you interested in getting exclusive benefits that nobody else has? Please click here: https://www.youtube.com/channe....l/UC4ZqZ6V67OWNUxBHL
► Subscribe for more Movies: http://bit.ly/WatchMOVIES
....................................................................................
👉🏼👉🏼👉🏼 More full Horror stories:
► CANNIBAL BOYS: https://youtu.be/d7BlRiOUhpA
► ALL I NEED: WAKE IN FEAR: https://youtu.be/hJjkT91wW4s
► SERENA WAITS: https://youtu.be/PnqE_dGrQFQ
...................................................................................... .
🌍 Check our DOCU-CHANNEL: https://www.youtube.com/channe....l/UCCyW1eFlwO6x9AwyL
Every week a new breathtaking documentary about the most remote places in the world and their rarest animal inhabitants.
.......................................................................................
► For business requests please contact: watchmoviesnowtv@gmail.com
ATTENTION: All of the films uploaded are legally licensed, and we have the YouTube rights for specific territories. Any copyright inquiries should be sent to watchmoviesnowtv@gmail.com.
Tags: horror movies best movies 2023 english


Presenting Hollywood English Movie Full Action HD (Hollywood Movie In English, Action movies, Jackie Chan Movies) "KUNG FU NANNY" Exclusively on @blockbusterenglishmovies Sit back & enjoy
Subscribe Us For Best Full Movies in English for FREE -
https://www.youtube.com/channe....l/UCq71uPvIx7A96590h
Synopsis:
Bob an undercover operative for the CIA, decides to give up his career and marry his girlfriend, Gillian. First however, he has one more mission to complete: Gain the approval of Gillian's children. Bob volunteers to baby-sit when Gillian is called away, but the operation hits a snag when one of the kids mistakenly downloads a top-secret formula, and a Russian terrorist takes aim at Bob's prospective family.
Subscribe Us For Best Full Movies in English for FREE -
https://www.youtube.com/channe....l/UCq71uPvIx7A96590h
#kungfunanny #actionmovie #hollywoodmovie

Presenting Hollywood Movies In English Full Action HD (Hollywood Movie English, English Movies, Action English Movies) "NORTHMEN" Starring Tom Hopper, Ryan Kwanten, Ken Duken. Exclusively on @primetimenglishmovies Sit back & enjoy
Subscribe Us For Best Full Movies in English for FREE - https://www.youtube.com/channe....l/UCvIe4KYlW1tEhUpYk
Popular English Movies
⦿ Dracula 2000 - https://youtu.be/TrgFKS07Tgo
⦿ Kiss Kiss - https://youtu.be/jzF9xQHdZNc
⦿ The Furies - https://youtu.be/7TXM2Ca8HkA
⦿ Zombie Island - https://youtu.be/gDW9-3iBNOE
⦿ Alone In The Dark 2 - https://youtu.be/d94WriMyAis
⦿ Only - https://youtu.be/5pomMOw1oHQ
⦿ Monster Island - https://youtu.be/9DdaXZfPjv8
⦿ DON JON - https://youtu.be/zQ9ICP5zpEk
⦿ Rise Of The Zombies - https://youtu.be/Jt4MqwEXLDY
⦿ Night Angel - https://youtu.be/kspVvpp0YAk
⦿ Twin Dragons - https://youtu.be/HugYvP11Kl4
⦿ Stiletto - https://youtu.be/Mz1rzq1U-5k
⦿ Steal - https://youtu.be/NEaAjlwR5Hw
⦿ Genghis : The Legend Of The Ten - https://youtu.be/rPf9IRnkBmA
⦿ Foolproof -https://youtu.be/9HzWRsy7Z4s
⦿ The Last Pagans Of Europe - https://youtu.be/JCnp7UpuNM8
⦿ Revenge - https://youtu.be/HgUSYApSX5g
⦿ Giant Python - https://youtu.be/H6ylelTHtwQ
⦿ Nomad The Warrior - https://youtu.be/EgQ0Lnc7lCQ
⦿ Dungeons & Dragon - https://youtu.be/4u8SZ7F66W4
⦿ Wolfhound - https://youtu.be/bRxebMjBt8s
⦿ American Soldier - https://youtu.be/H38JTcoHG6A
⦿ Rezort - https://youtu.be/H38JTcoHG6A
⦿ Behemoth - https://youtu.be/SdCQ8PaYKoE
Writer: Bastian Zach, Matthias Bauer
Director: Claudio Fäh
Synopsis:
A band of Vikings cross enemy lines and a panicked race begins. The losers will pay with their lives.
Subscribe Us For Best Full Movies in English for FREE - https://www.youtube.com/channe....l/UCvIe4KYlW1tEhUpYk
#northmen #tomhopper #warriormovies #hollywoodmovie

I saw a lot of DIY 'Ultrasonic' inspired parts cleaners on YouTube using a sander but not a lot in the way of results. I gave it a go and here are the results. If you have found a way it actually works I would love to hear about it.
Help out the channel by visiting the store
http://homebuiltbyjeff.storenvy.com/
Find more Home Built by Jeff
https://www.facebook.com/HomeBuiltByJeff/
https://www.instagram.com/homebuiltbyjeff/
Mailing Address;
Home Built by Jeff
PO Box 1520
Bowral, NSW 2576
AUSTRALIA
Music:
http://www.bensound.com
https://soundcloud.com/joakimkarud/rock-angel
SirensCeol - Nostalgia [NCS Release]
https://www.youtube.com/watch?v=geW8xN7grpg
