- Film & Animation
- Music
- Pets & Animals
- Sports
- Travel & Events
- Gaming
- People & Blogs
- Comedy
- Entertainment
- News & Politics
- How-to & Style
- Non-profits & Activism
- Religion & Spiritual
- Health Natural Remedies
- Gardening +
- Arts & Crafts
- Action
- Hair & Beauty
- Hunting & Survival
- Shopping & Reviews
- Motivational & Self Help
- Jesus
- Marriage
- Live TV
- Programing & Coding
- Latest & Gadgets
- Make You Own
- Unexplained & Stange
- Jesus Christ
- Food & More
- Other
Top videos



From New Creation Church, Singapore "I Sing Hosanna" DVD album lead by one of the most anointed worship team under God's Grace. This is the main theme of the entire album
Please show your support by purchase the DVD album
https://www.josephprince.com/I....-Sing-Hosanna-DVD.ht
For CD album
https://www.josephprince.com/I....-Sing-Hosanna-Music-

Using a Raspberry Pi shouldn’t be complicated.
📥 Download my free PDF glossary to start the right way: https://download.raspberrytips.com/glossary
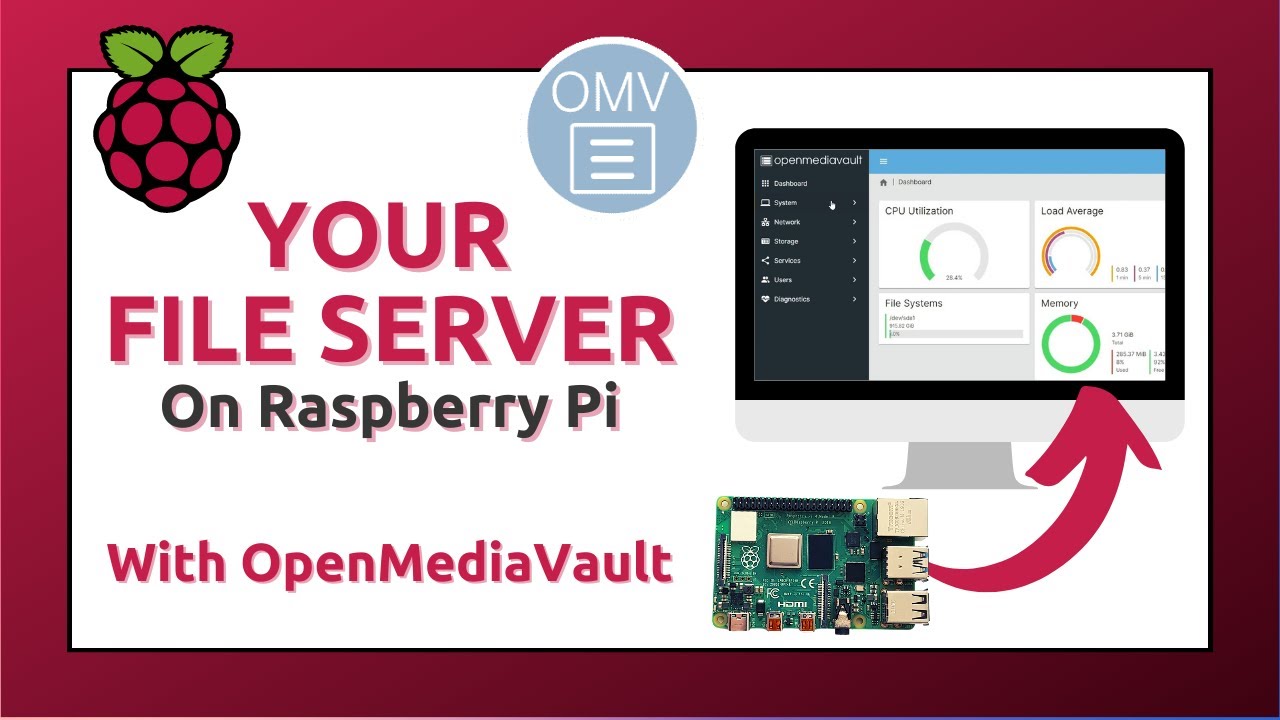
OpenMediaVault is software that can be installed on any Debian-based distribution, like Raspberry Pi OS Lite. It can be used to host and configure a file server via a web interface in a few clicks.
In this video, I show you how to use it, and make a quick comparison with my Synology NAS.
Hardware used for this video:
- Argon One case: https://raspberrytips.com/argonone (Amazon)
- SSD in the case: https://raspberrytips.com/m2ssd (Amazon)
- USB key for RPI OS: https://raspberrytips.com/myusbkey (Amazon)
- My Raspberry Pi: https://raspberrytips.com/mypi4 (Amazon)
- Synology NAS: https://raspberrytips.com/syno (Amazon)
Check the article for more details:
https://raspberrytips.com/open....mediavault-on-raspbe
Installation command (one line):
wget -O - https://github.com/OpenMediaVa....ult-Plugin-Developer | sudo bash
---------- Links ----------
Master your Raspberry Pi in 30 days (e-book)
📕 https://raspberrytips.com/yt-ebook
Raspberry Pi Bootcamp (course)
📕 https://raspberrytips.com/yt-course
Master Python on Raspberry Pi
📕 https://raspberrytips.com/masterpython
Join us on Patreon!
❤️ https://raspberrytips.com/patreon
👉RaspberryTips: https://raspberrytips.com/
👉Recommended hardware: http://raspberrytips.com/resources
---------- My stuff ----------
(affiliate links)
- Raspberry Pi: https://raspberrytips.com/rpi4 (Amazon)
- SD card: https://raspberrytips.com/sd (Amazon)
- Case: https://raspberrytips.com/case (Amazon)
- Keyboard: https://raspberrytips.com/keyboard (Amazon)
- Touch screen: https://raspberrytips.com/screen (Amazon)
- Video capture: https://raspberrytips.com/capture (Amazon)
- Sense Hat: https://raspberrytips.com/sensehat (Amazon)
- Robot dog: https://raspberrytips.com/robotdog (Amazon)
- Raspad 3: https://raspberrytips.com/raspad
---------- Follow Me! ----------
👉Twitter: https://twitter.com/TipsRaspberry
👉Pinterest: https://www.pinterest.com/raspberrytips/
---------- Timestamps ----------
0:00 Intro
0:32 Why?
1:23 Prerequisites
2:18 Installation
3:22 Overview
4:40 File share creation
6:39 OMV vs Synology vs manual install
7:44 Similar tool
#raspberrypi #openmediavault #synology
Note: This description contains affiliate links.
If you use them, I’ll get a small commission.
The commission comes at no additional cost to you.
RaspberryTips is a participant in the Amazon Associates and other companies affiliate programs.

Rick begins his new series by examining what we know from the Bible and Adam’s family tree to reveal what the earth was like before the flood. To order the series and book offer click SHOW MORE.
Rick Renner has unlocked the mystery surrounding the “sons of God” and the “giants” that appeared in the earth before the Flood during the days of Noah. Rick says, “This is THE series I’ve wanted to teach for decades. With the research we conducted at the real Noah’s Ark, along with amazing historical records, I believe this long-awaited series will answer a multitude of questions for people who have wondered about the strange events that occurred before the Flood and what Jesus said about them being repeated at the end of the age.” https://renner.org/product/fal....len-angels-giants-mo
Giants, Fallen Angels, and the Return of the Nephilim by Dennis Lindsey will discuss biblical prophecies of giants on the earth, the Last Days demonic plot of engineering genetic hybrids, and what all of it has to do with Israel and the Middle East.
https://renner.org/product/gia....nts-fallen-angels-an

In this comprehensive tutorial, we'll guide you through the step-by-step process of building and setting up a RAID 10 NAS (Network Attached Storage) using the Raspberry Pi 4 or the latest Raspberry Pi 5.
Learn how to enhance your storage capabilities, improve data redundancy, and boost performance by configuring a RAID 10 array on these compact and powerful single-board computers.
🔧 Topics Covered:
- Introduction to RAID 10 and its benefits
- Choosing the right hardware components for your NAS setup
- Installing the necessary software and operating system
- Preparing and formatting your storage drives
- Configuring RAID 10 using software RAID tools (MDADM and Webmin)
- Setting up Samba Server
- Configuring network access and permissions
- Testing and optimizing your RAID 10 NAS for performance
Whether you're a beginner or an experienced Raspberry Pi enthusiast, this tutorial provides valuable insights and practical tips to create a reliable and efficient NAS solution for your home or small office.
Commands (in Sequence):
sudo apt update
sudo apt upgrade -y
sudo apt install mdadm
sudo nano /etc/apt/sources.list
Paste the following:
deb https://download.webmin.com/download/repository sarge contrib
sudo apt-key add jcameron-key.asc
sudo apt update && sudo apt install webmin -y
Format RAID10
sudo mkfs.ext4 -v -m .1 -b 4096 -E stride=32,stripe-width=64 /dev/md0
sudo mkdir /media/SambaNAS
sudo mount /dev/md0 /media/SambaNAS
sudo chown ravi:ravi /media/SambaNAS
sudo apt install samba
sudo nano /etc/samba/smb.conf
Paste this at the end:
[RAID10_NAS]
comment = RADI10 NAS on Raspberry Pi
path = /media/SambaNAS
read only = no
browsable = yes
sudo service smbd restart
sudo blkid
sudo nano /etc/fstab
UUID=(my_uuid) /media/SambaNAS ext4 defaults,nofail 0 0
cat /etc/fstab
Please Support me on Patreon: https://www.patreon.com/techposts
-My Gears-
My Camera- http://amzn.to/2mkYkT1
My Laptop- http://amzn.to/2r1MQtl
My Mic (Voice-over) - http://amzn.to/2ml0H88
My Lav Mic- http://amzn.to/2CSAIft
My Smartphone- http://amzn.to/2FvNimK
My Tripod- http://amzn.to/2CUsVxC and Pico Dolly: http://amzn.to/2ExqXUA
My Tripod (For Smartphone)- http://amzn.to/2D374bA
32GB Memory Card- http://amzn.to/2DjQDV3
Green Screen- http://amzn.to/2mkZ0Yv
Boom Arm For Mic- http://amzn.to/2Dl6mDn
Subscribe to our Youtube Channel for More: http://goo.gl/BE00aR
You can also Follow "Techposts" on:
Facebook: https://www.facebook.com/techposts007
Google+: https://google.com/+Ravisingh9
Twitter: https://twitter.com/coolbuddy543
Visit http://http://techposts.org for More Tech How to guides.

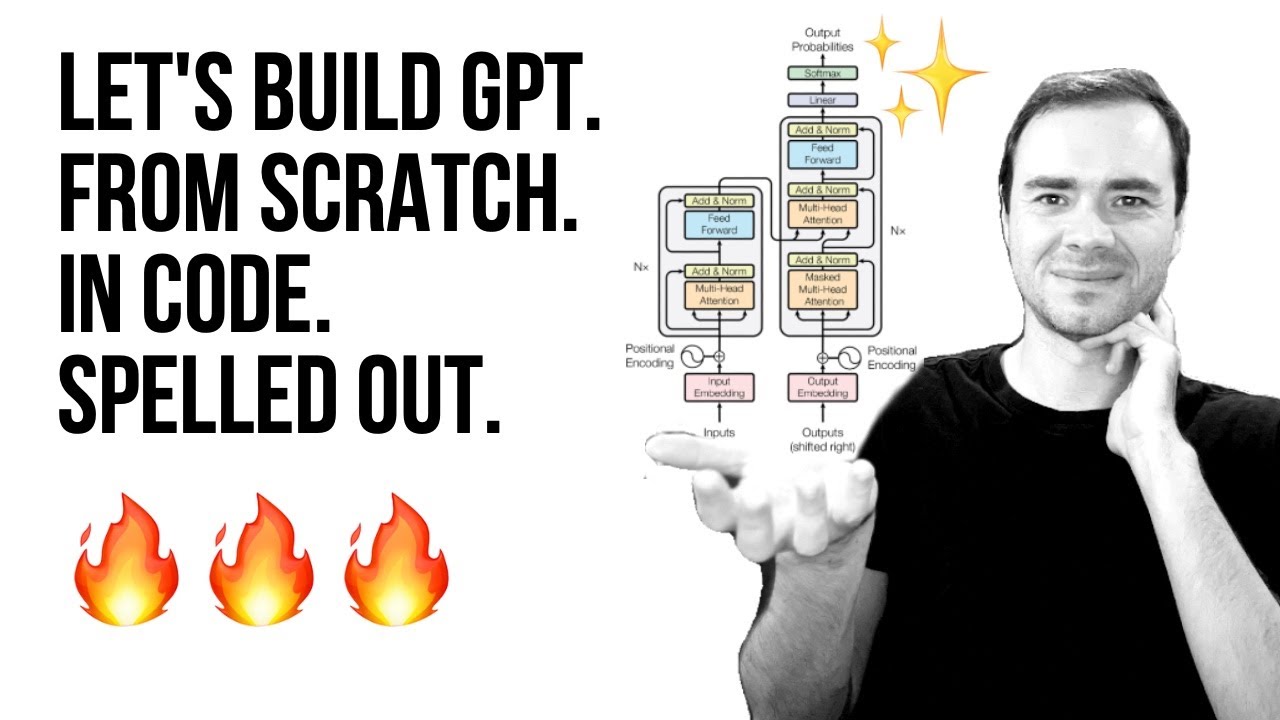
We build a Generatively Pretrained Transformer (GPT), following the paper "Attention is All You Need" and OpenAI's GPT-2 / GPT-3. We talk about connections to ChatGPT, which has taken the world by storm. We watch GitHub Copilot, itself a GPT, help us write a GPT (meta :D!) . I recommend people watch the earlier makemore videos to get comfortable with the autoregressive language modeling framework and basics of tensors and PyTorch nn, which we take for granted in this video.
Links:
- Google colab for the video: https://colab.research.google.....com/drive/1JMLa53HDu
- GitHub repo for the video: https://github.com/karpathy/ng-video-lecture
- Playlist of the whole Zero to Hero series so far: https://www.youtube.com/watch?v=VMj-3S1tku0&list=PLAqhIrjkxbuWI23v9cThsA9GvCAUhRvKZ
- nanoGPT repo: https://github.com/karpathy/nanoGPT
- my website: https://karpathy.ai
- my twitter: https://twitter.com/karpathy
- our Discord channel: https://discord.gg/3zy8kqD9Cp
Supplementary links:
- Attention is All You Need paper: https://arxiv.org/abs/1706.03762
- OpenAI GPT-3 paper: https://arxiv.org/abs/2005.14165
- OpenAI ChatGPT blog post: https://openai.com/blog/chatgpt/
- The GPU I'm training the model on is from Lambda GPU Cloud, I think the best and easiest way to spin up an on-demand GPU instance in the cloud that you can ssh to: https://lambdalabs.com . If you prefer to work in notebooks, I think the easiest path today is Google Colab.
Suggested exercises:
- EX1: The n-dimensional tensor mastery challenge: Combine the `Head` and `MultiHeadAttention` into one class that processes all the heads in parallel, treating the heads as another batch dimension (answer is in nanoGPT).
- EX2: Train the GPT on your own dataset of choice! What other data could be fun to blabber on about? (A fun advanced suggestion if you like: train a GPT to do addition of two numbers, i.e. a+b=c. You may find it helpful to predict the digits of c in reverse order, as the typical addition algorithm (that you're hoping it learns) would proceed right to left too. You may want to modify the data loader to simply serve random problems and skip the generation of train.bin, val.bin. You may want to mask out the loss at the input positions of a+b that just specify the problem using y=-1 in the targets (see CrossEntropyLoss ignore_index). Does your Transformer learn to add? Once you have this, swole doge project: build a calculator clone in GPT, for all of +-*/. Not an easy problem. You may need Chain of Thought traces.)
- EX3: Find a dataset that is very large, so large that you can't see a gap between train and val loss. Pretrain the transformer on this data, then initialize with that model and finetune it on tiny shakespeare with a smaller number of steps and lower learning rate. Can you obtain a lower validation loss by the use of pretraining?
- EX4: Read some transformer papers and implement one additional feature or change that people seem to use. Does it improve the performance of your GPT?
Chapters:
00:00:00 intro: ChatGPT, Transformers, nanoGPT, Shakespeare
baseline language modeling, code setup
00:07:52 reading and exploring the data
00:09:28 tokenization, train/val split
00:14:27 data loader: batches of chunks of data
00:22:11 simplest baseline: bigram language model, loss, generation
00:34:53 training the bigram model
00:38:00 port our code to a script
Building the "self-attention"
00:42:13 version 1: averaging past context with for loops, the weakest form of aggregation
00:47:11 the trick in self-attention: matrix multiply as weighted aggregation
00:51:54 version 2: using matrix multiply
00:54:42 version 3: adding softmax
00:58:26 minor code cleanup
01:00:18 positional encoding
01:02:00 THE CRUX OF THE VIDEO: version 4: self-attention
01:11:38 note 1: attention as communication
01:12:46 note 2: attention has no notion of space, operates over sets
01:13:40 note 3: there is no communication across batch dimension
01:14:14 note 4: encoder blocks vs. decoder blocks
01:15:39 note 5: attention vs. self-attention vs. cross-attention
01:16:56 note 6: "scaled" self-attention. why divide by sqrt(head_size)
Building the Transformer
01:19:11 inserting a single self-attention block to our network
01:21:59 multi-headed self-attention
01:24:25 feedforward layers of transformer block
01:26:48 residual connections
01:32:51 layernorm (and its relationship to our previous batchnorm)
01:37:49 scaling up the model! creating a few variables. adding dropout
Notes on Transformer
01:42:39 encoder vs. decoder vs. both (?) Transformers
01:46:22 super quick walkthrough of nanoGPT, batched multi-headed self-attention
01:48:53 back to ChatGPT, GPT-3, pretraining vs. finetuning, RLHF
01:54:32 conclusions
Corrections:
00:57:00 Oops "tokens from the _future_ cannot communicate", not "past". Sorry! :)
01:20:05 Oops I should be using the head_size for the normalization, not C

How To Install Ubuntu Mate On The Raspberry Pi 2
NEW 2016 VERSION- NEW 2016 VERSION HERE - https://youtu.be/Xa7E4vOqq4Q
Download Ubuntu Mate Here- https://ubuntu-mate.org/raspberry-pi/
Download Win32 Disk Imager - http://sourceforge.net/projects/win32diskimager/
Download SD formatter- https://www.sdcard.org/downloads/formatter_4/
DISCLAIMER: This video and description contains affiliate links, which means that if you click on one of the product links, I’ll receive a small commission. DISCLAIMER: Under section 107 of the Copyright Act 1976, allowance is made for “fair use” for purposes such as criticism, comment, news reporting, teaching, scholarship, education, and research. No Games Or Applications Are Included Or Added On Or To Any Device In This Video


Use the link below to receive a FREE BEAKER & BEAKER HOLDER ATTACHMENT when you buy the P4810 or P4831 from our website:
http://www.isonicinc.com/promo
iSonic Inc makes professional level ultrasonic cleaners, which provide enough power and ultrasonic energy to thoroughly encapsulate vitamin C in liposomes. Watch this video to decide which iSonic ultrasonic cleaner is best for you, and visit our website at http://www.isonicinc.com to purchase your preferred model today!
We recommend the P4810 for home use and our P4831 model for high production of liposomal vitamin C. We always recommend using either our 500ml or 1000ml beakers when making liposomal vitamin C in an ultrasonic cleaner, as well as one of our beaker holder attachments.
Follow us on Instagram and Facebook!
http://instagram.com/isonicinc
https://www.facebook.com/isonicinc
Do you have questions? Email us at info@isonicinc.com
![[Updated 2019] OpenVPN Installation. Windows Client/Linux Server](https://i.ytimg.com/vi/rD0I0d6a-tE/mqdefault.jpg)
ANOTHER SECURITY CHANGE OCCURRED WITH OPENVPN 2.4 AFTER THIS VIDEO WAS MADE.
At 9:50 an edit is made to the ssl config file to change md5 to sha512. Just above that line you should see:
default_crl_days= 30
change this so it reads
default_crl_days= 3650
If this is not done when using OpenVPN 2.4 your VPN will stop accepting connections 30 days later.
----------------------------------
Services used in this video
VPS Supplier: https://cloud.digitalocean.com/login
(Note, I am not endorsing Digital Ocean. I do not receive any reward or commission from them. They are simply the provider I use.)
Windows applications used in this video
PuTTY: https://www.chiark.greenend.or....g.uk/~sgtatham/putty
WinRAR: https://www.rarlab.com/download.htm
OpenVPN: https://openvpn.net/community-downloads/
FireFox: https://www.mozilla.org/
Notepad :)
Login to VPS with PuTTY: root@IP.ADDRESS
Change root password but DO NOT USE THE SAME ONE I USED!!!
Update the VPS
apt update
apt dist-upgrade
Enable packet forwarding
nano /etc/sysctl.conf
VPS Login PuTTY shortcut
root@IP.ADDRESS -pw ROOTPASSWORD
Install OpenVPN
apt install openvpn
Install Webmin
http://www.webmin.com/deb.html
apt install -f
Login to Webmin
https://IP.ADDRESS:10000
user: root
password: ROOTPASSWORD
Change default_md
nano /etc/openvpn/openvpn-ssl.cnf
Create .rnd file
https://www.random.org/bytes/
Create VPN server instance
10.50.0.0 255.255.255.0
auth SHA512
push "dhcp-option DNS 8.8.8.8"
push "dhcp-option DNS 8.8.4.4"
push "redirect-gateway def1 bypass-dhcp"
Set OpenVPN to autostart
nano /etc/default/openvpn
Check VPN server is running
service openvpn@myvpn status
Check IP address
https://www.whatsmyip.org/

At the 2024 Branson Victory Campaign, Kenneth Copeland teaches from Habakkuk
2:1-3 how without a vision, people die spiritually. You must have something
to look forward to each day. The Bible is full of vision! Finding out the
will of God is how you get vision. See it in your heart continually and
don’t let go!
Get more out of this broadcast! Download the notes @ kcm.org/notes.
Livestream more episodes for FREE @ kcm.org/watch.
Subscribe to get a daily faith boost from Kenneth and Gloria Copeland delivered to your inbox @ http://bit.ly/2mmE5XW.
ABOUT THE BELIEVER’S VOICE OF VICTORY TV BROADCAST:
Believer’s Voice of Victory (BVOV) is a daily Christian TV broadcast produced by Kenneth Copeland Ministries (KCM) that teaches Christians how to live a life of faith and victory using principles from the Bible.
Learn more about KCM and how we can help you live an overcoming, victorious and successful life @ http://www.kcm.org/about-us.


In this video.I will Show you how to program arduino with mobile phone and making ultrasonic sensor obstacle detector project with arduino I am using arduino UNO you can also use any of arduino boards.
You Need
1)Arduino Uno
2)Ultrasonic Sensor
3)Two different colour Led's red and blue
Buy Arduino Uno :https://www.amazon.in/gp/product/B015C7SC5U/ref=as_li_qf_sp_asin_il_tl?ie=UTF8&tag=indilife-21&camp=3638&creative=24630&linkCode=as2&creativeASIN=B015C7SC5U&linkId=f6a1e4d0cb3e353d3fd01e4f3b20ced5
Buy Ultrasonic Sensor :https://www.amazon.in/REES52-Ultrasonic-Distance-Measuring-Transducer/dp/B00MYYE6XM/ref=mp_s_a_1_3?ie=UTF8&qid=1543394944&sr=1-3&pi=AC_SX118_SY170_FMwebp_QL65&keywords=ultrasonic+sensor
Circuit diagram:http://projects.treadstoneweb.....com/arduino/ultrason
Code:http://projects.treadstoneweb.....com/arduino/ultrason
Arduino Ultrasonic sensor projects
Arduino Ultrasonic distance meter
Top 10 Ultrasonic sensor projects
How to make an Ultrasonic sensor project

📜 Lyrics: "Tearin Up My Heart" https://pillowlyrics.com/teari....n-up-my-heart-n-sync
📜 VISIT OUR OFFICIAL LYRICS WEBSITE: https://www.pillowlyrics.com/
📜 Lyrics: https://www.pillowlyrics.com/n-sync-lyrics/
Tearin Up My Heart - NSync (Lyrics)
Lyrics video for "Tearin Up My Heart" by NSync.
✅Click the 🔔 to stay updated on the latest uploads!
👍 Thumbs Up if you like this video.
❤️Thank you! ❤️
You can also find us on:
▪️ Facebook - https://www.facebook.com/pillowmusicyt
▪️ Instagram - https://www.instagram.com/pillowmusicyt/
▪️ Twitter - https://twitter.com/PillowMusic1
📜 VISIT OUR OFFICIAL LYRICS WEBSITE: https://www.pillowlyrics.com/
📜 Lyrics: https://www.pillowlyrics.com/n-sync-lyrics/
It's tearin' up my heart (tearin' up my heart and soul) when I'm with you
But when we are apart, I feel it too (we're apart I feel it too)
And no matter what I do, I feel the pain
with or without you
And no matter what I do, I feel the pain
With or without you
- - - - - - - - - - - -
📷 Wallpaper: https://unsplash.com
➡️ Images: All the images are copyright free.
- - - - - - - - - - - -
#TearinUpMyHeart #NSync #Lyrics
#Pillow #Pillowmusic #DopeLyrics #7Clouds #UniqueVibes #SyrebralVibes #TazNetwork #MrShades #LeaderOfLyrics #SuperbLyrics #Cassiopeia #ShadowMusic #TikTok #SpotifyViral

I saw a lot of DIY 'Ultrasonic' inspired parts cleaners on YouTube using a sander but not a lot in the way of results. I gave it a go and here are the results. If you have found a way it actually works I would love to hear about it.
Help out the channel by visiting the store
http://homebuiltbyjeff.storenvy.com/
Find more Home Built by Jeff
https://www.facebook.com/HomeBuiltByJeff/
https://www.instagram.com/homebuiltbyjeff/
Mailing Address;
Home Built by Jeff
PO Box 1520
Bowral, NSW 2576
AUSTRALIA
Music:
http://www.bensound.com
https://soundcloud.com/joakimkarud/rock-angel
SirensCeol - Nostalgia [NCS Release]
https://www.youtube.com/watch?v=geW8xN7grpg