
- Film & Animation
- Music
- Pets & Animals
- Sports
- Travel & Events
- Gaming
- People & Blogs
- Comedy
- Entertainment
- News & Politics
- How-to & Style
- Non-profits & Activism
- Religion & Spiritual
- Health Natural Remedies
- Gardening +
- Arts & Crafts
- Action
- Hair & Beauty
- Hunting & Survival
- Shopping & Reviews
- Motivational & Self Help
- Jesus
- Marriage
- Live TV
- Programing & Coding
- Latest & Gadgets
- Make You Own
- Unexplained & Stange
- Jesus Christ
- Food & More
- Other
Top videos


For more details on this build click here: https://thediyfix.com/diy-log-store/
In this video you can follow along as I build a DIY log store from scratch. The video is step by step, meaning you should be able to follow along and build your own log store.
There are also a couple of technical drawings in the video for the main frames.
The process is very simple, and the measurements ensure that there is very little waste. This means you only pay for the wood you need for the project. Which is significantly cheaper than buying one from a store.
Materials needed for DIY log store:
• 5 lengths sawn treated timber – 75 x 47mm – 3600mm (C16 eased edge)
• 12 lengths sawn treated timber – 100 x 20mm – 3600mm
• 1 length treated timber batten – 50 x 25mm – 3600mm
• 0.5 sheets Hardwood faced plywood - 610 x 2440mm
• Roll of roof felt
• 1 tin of Blackjack roof felt adhesive
• Box of 100 - 100mm multi-purpose screws
• Box of 100 - 50mm green decking screws
• Box of heavy duty 10mm staples
Tools required:
• Chop saw – If you don’t have a chop saw cuts can be done by hand but it will take longer
• Cordless drill/driver
• Tape measure
• Pencil
• Square
• Bevel
• Staple gun
• Large stiff paint brush
I honestly believe that anyone, with even a basic knowledge of DIY could build this. Just follow the simple steps outlined in the video to build your very own, home-made wood store.


In this episode of OMGcraft, Chad shows you the correct way to build an End Portal in Minecraft.
Check Out OMGchad Merch at http://helloomg.com
● TWITTER: http://twitter.com/omgchad
● INSTAGRAM: http://instagram.com/omgchad
● TWITCH: http://twitch.tv/omgchad
● PATREON: http://patreon.com/omgchad
● OMGCHAD: http://youtube.com/omgchad
● EMAIL: mail@omgcraft.com
DedicatedMC kindly provides my Minecraft servers! For 15% off your first month, use my code "OMGChad" (no quotes) link: http://dedimc.promo/omgchad http://dedimc.promo/omgchad
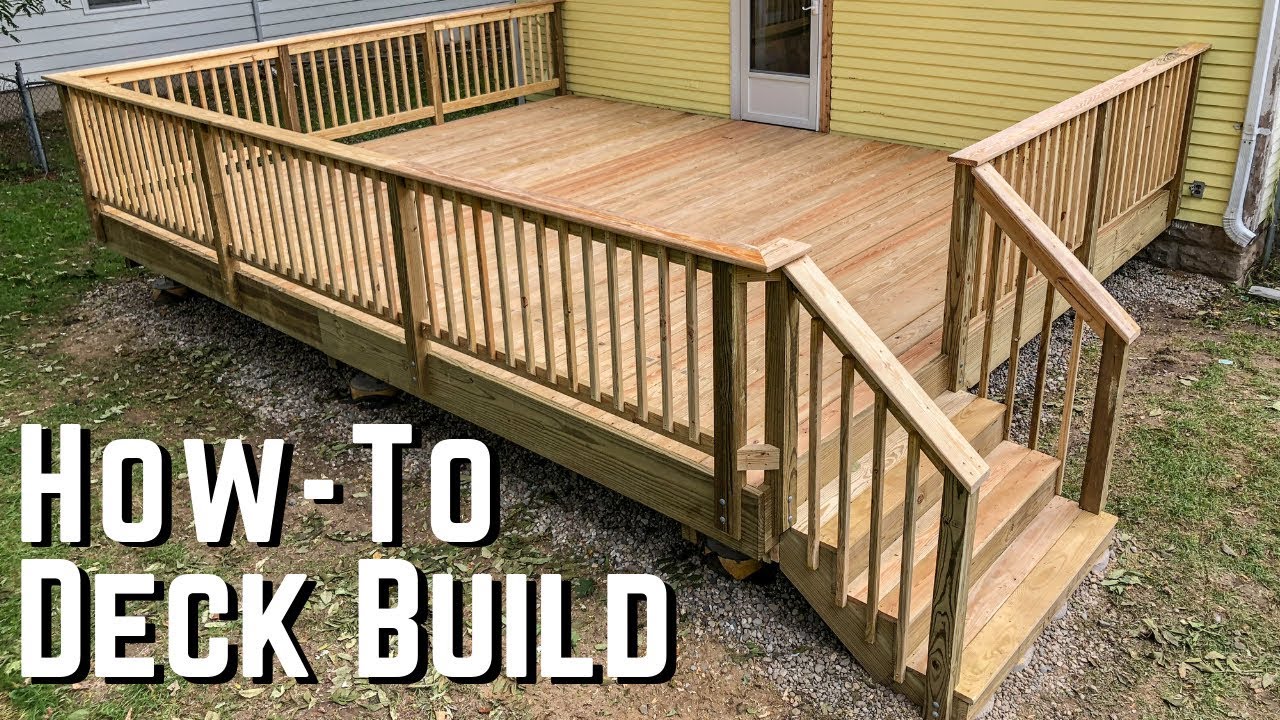
Lowe's Sponsored this video where I show how easy it can be to build a deck. I used their easy to use Deck Designer Software to design a beautiful and easy to build deck, then took the print out into Lowe's where they gathered the materials for me and delivered it right to the building site.
~~ Lowe's Free Deck Designer Online Software
https://lowestools.diyonline.com/servlet/GIB_Base/lowes_entrypage.html?storeid=1596&from_entrypage=1?cm_mmc=im_-_-YT-_-HOW-_- thirdcoast-_-deck103108
~~ How To Make Deck Stairs
https://youtu.be/LtZHN51tEQU
~~ A couple more great deck building video series
https://youtu.be/MeDvNXAJ7vY
https://youtu.be/v79flY1pIKk
"MERCHANDISE"
https://www.thirdcoastcraftsman.com
"MY WEBSITE"
https://www.thirdcoastcraftsman.com
"MY FAVORITE TOOLS" https://www.thirdcoastcraftsman.com/favorite-handtools
"SUPPORT ME ON PATREON AND GET COOL REWARDS!!!" https://www.patreon.com/thirdcoastcraftsman
Instagram -- https://www.instagram.com/thirdcoastcraftsman
Facebook -- https://www.facebook.com/ThirdCoastCraftsman
DISCLAIMER: Woodworking and the use of power and hand tools can be extremely dangerous. You are responsible for understanding the safe use of your tools and techniques. Your safety is YOUR responsibility, I accept NO responsibility or liability for any injuries, accidents, death occurring to you or others if you attempt to do the things that I do or use advice that I give.

Believe it or not, there are sequences in construction. If there were not, we would all end up building our own individual portion of the project at the same time or at random times and we would wind up having an awful mess on our hands (not to mention a complete train wreck of a project)! In this episode of Electrician U, Dustin digs into the different phases of building a house.
🤘⚡️MEMBERSHIP⚡️🤘
JOIN ELECTRICIAN U - become a member and get:
FREE Continuing Education every year
FREE Practice Exams
FREE Monthly Video Courses
FREE Weekly Live Instructor-Led Classes
FREE Monthly Educational Newsletter
Premium Members-Only Content
Private Discord Channel
Monthly Members-Only Discord Chats
Sign up here --- https://www.electricianu.com/e....lectrician-u-members
🎧🎹MUSIC AND VIDEO:🎹🎧
https://www.facebook.com/descantmv
🎬✍️ART AND ILLUSTRATION:✍️🎬
https://www.daverussoart.com
Before we start, there are a few things to discuss. For one, there are many (MANY!!) different phrase choices for the different phases, and these tend to vary from one location in the country to the other. So, for the purposes of this discussion, we will just talk in generalities, and you can adjust to where you are at to get the language just right! Also, while we ALL must work together to have a successful project, the different trades, and the different jobs Within each trade, will have more interest and interaction with the various phases of a construction job. A trim carpenter will most likely have no interaction with the site prep phase but will have a major part in the trim out phase.
One of the first things we must do is get the site ready to accept the job. We will call this Site Prep. Dirt must be moved and leveled, trees and underbrush must be cleared, and sometimes access roads must be built to give us access to the site. For us electricians (or anyone in the MEP trades) this is where we put in our deep underground conduits, bring our utilities to the site, and put in any of our work in that needs to be put in the ground. Closely behind the site prep portion is the slab work. This is where the rebar is installed and tied, and the concrete slab is placed. As electricians, we also must be present here to install the smaller branch conduits, floor boxes, etc. that go into the slab as well as install our Ufer grounds. This is also the point where the temporary utilities are brought to the site to use during construction.
Framing of the structure is the next phase of construction. Interior and exterior walls are framed, the roof is installed, and the building is dried in. This is the point where the MEP trades will do the rough in for their respective trades. Plumbing pipes are installed, ducts put in, and wiring is run. This is the process where it appears to have the most work done as you started off with just a slab of concrete and when done you have a building! As soon as those trades have finished, and their work is inspected (and passed!!) the drywall can be installed, and finishing can begin.
During the finishing stages the typical sequence is drywall is hung, taped, and floated, then textured. Once texture is complete, then the cabinets, tile, trim wood, etc. are installed. Typically, this work is done before final paint as installing those finishes can result in scuffing up the walls a bit, so paint is left until after. After the paint is dry, the MEP trades are released to come in and install their respective trim out devices. For us electricians, this is where we put in the receptacles, switches, can light trims, surface ceiling fixtures, and things of that nature. Serious consideration must be given to the scheduling of the various trades at any one time so we aren’t working on top of each other (or at least as little as possible) so we can get our jobs done in a timely fashion.
The last thing to be done once the trim has been placed is get the final inspection(s) for the project. A thorough run through the project is made by the inspector, and once he/she is satisfied that we have installed everything appropriately, they will release the project with a certificate of occupancy!
Sometimes the sequences are a bit different, and some of the tasks will vary from project to project and location to location, but these steps are fairly typical of a standard project. We hope this has been insightful into the steps necessary to build a home. Is there a particular topic you would like to have discussed? Please leave some comments in the section below and let us know. Please continue to follow Dustin and Electrician U as we are constantly adding new content to assist our viewers in their careers!
#electrician #electrical #electricity #sparky life #electrical contractor #construction management
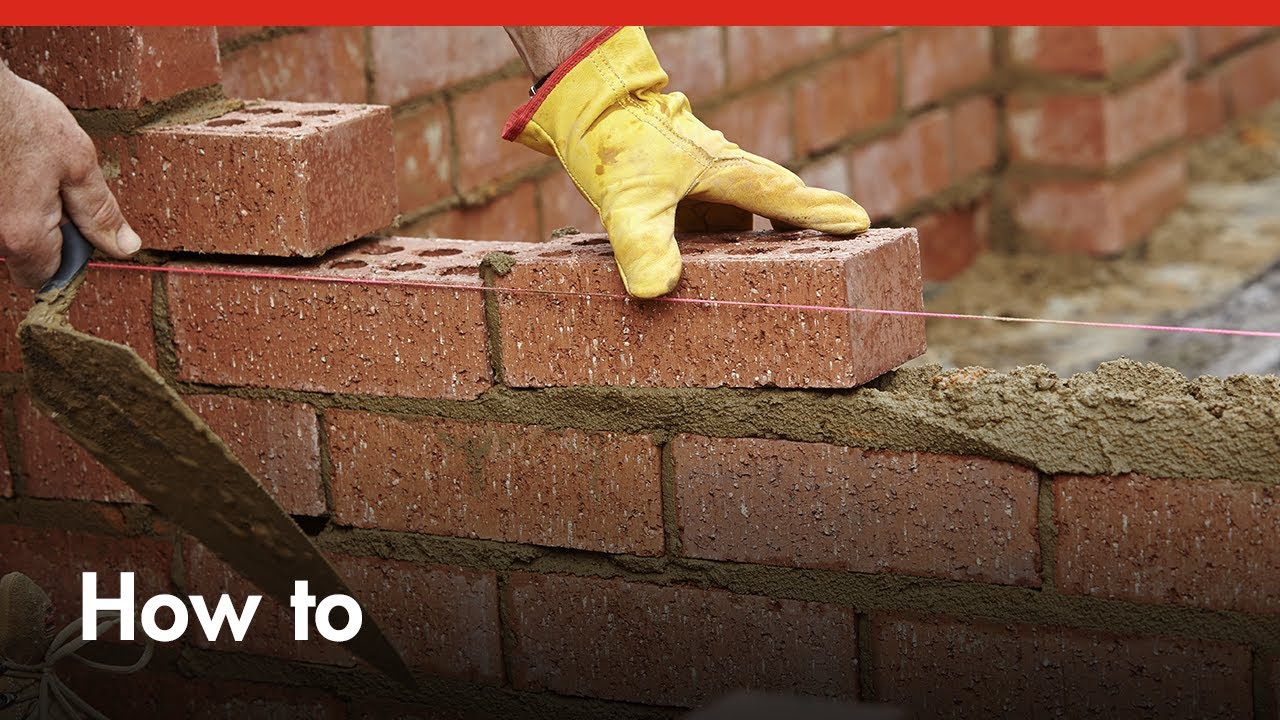
The art of laying #bricks is a good skill to learn if you want to take your #D.I.Y. to the next level. This video from #bunnings Warehouse will show you what’s involved in building a brick wall.
Tools and materials
Tools:
Clamps
Hammer
Safety glasses
Shovel
Spirit level
String
Trowel
Wheelbarrow
Wood
Materials:
Bricks
Cement mix
Lime
Water
Sand
For more DIY advice and information, visit the Bunnings website today: http://www.bunnings.com.au/diy-advice

Paul Ricalde gives step by step easy instructions on Truss Roof Rafters for your shed. These instructions are part of a complete tutorial on how to build a shed yourself. This is 1 part of a new Paulstoolbox series.
Worx Pegasus Saw Horse/Table https://amzn.to/34PBKr8
Worx ExactTrack Saw https://amzn.to/34Hl311
Swanson Blue Book https://amzn.to/32CjBuL
Swanson 7" Speed Square with Blue Book https://amzn.to/2Q8Ygbd
Swanson 12" Speed Square W/Blue Book https://amzn.to/2AaGmK3
Dewalt 12" Compound Miter Saw https://amzn.to/2NX0yaw
Rockwell Jaw Stand https://amzn.to/2NaljA0
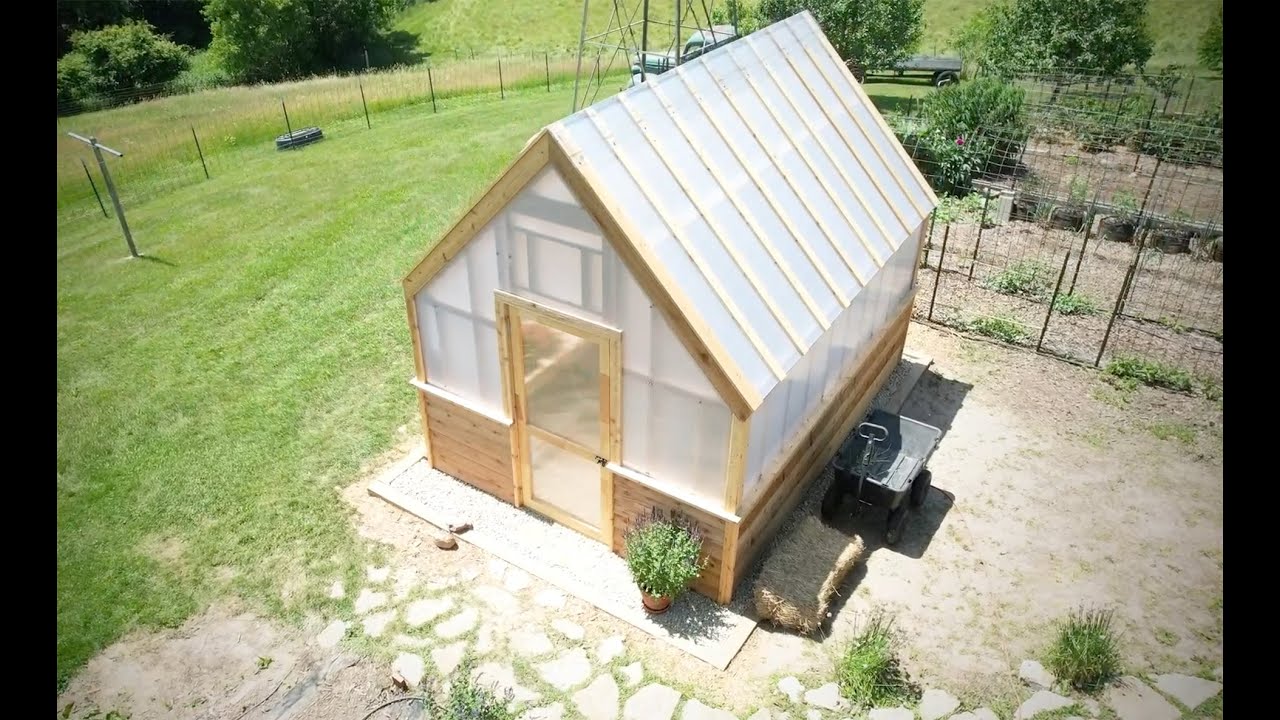
Here in the Upper Midwest, the gardening season is short, typically May through September. By building a greenhouse, we can harness the sun’s rays to let plants thrive as early as March and extend harvest into late fall. A greenhouse is also a great place to store less hardy plants during harsh winters. Get more project details at: https://www.familyhandyman.com..../project/how-to-buil
Even if you live in a more temperate region, a greenhouse will create a perfect climate for plants, protecting them from temperature swings, storms and pests. We built our greenhouse from cedar, which weathers beautifully, and polycarbonate sheets, which diffuse the sunlight and give even exposure to all the plants.
Mini Retaining Wall - 0:44
Build the Walls - 1:34
Front Wall - 3:08
Ground Anchoring - 3:45
Assemble the Trusses - 4:29
Install the Gables - 5:04
Installing the Door - 6:44
Sheathing the Greenhouse - 9:01
Installing the Siding - 9:43
Installing the Roof - 10:20
#familyhandyman #diygreenhouse #greenhouse #howtobuild
Visit our website or social channels for more Family Handyman content and expertise.
Website: https://www.familyhandyman.com
Facebook: https://www.facebook.com/TheFamilyHandyman
Pinterest: https://www.pinterest.com/family_handyman/
Twitter: https://twitter.com/Family_Handyman
Instagram: https://www.instagram.com/familyhandyman/
YouTube: https://www.youtube.com/user/thefamilyhandyman
Subscribe to our channel: https://www.youtube.com/channe....l/UCyFmmBgEIeZKthkgA
Every product is independently selected by our editors. If you buy something through our links, we may earn an affiliate commission.


How to build a outdoor wood deck- by yourself in just 3 days. DIY style step by step deck building & construction guide, framing, Menards deck hand rails -everything
Heres the best prices on Some of my favorite Amazon tools:
Dewalt concrete saw: https://amzn.to/2FsxsNE
Fiskars axe: https://amzn.to/2DIsieP
Gear wrench Speaker: https://amzn.to/2Lbhl6l
Makita Power shaft Multitool: https://amzn.to/2DroIowShock strap: https://amzn.to/2KoEAth
Milwaukee heated coat: https://amzn.to/2r164fr
10% off Kujo shoes here: http://www.kujoyardwear.com/?promo=10dirtmonkey
Diablo Metal cutting blade: https://amzn.to/2Kan8bE
ISO tunes
http://ISOtunesAudio.com?rfsn=1826204.613aa5
Milwaukeetools Air Compressor https://amzn.to/2EfYCoP
Winter equipment-Best cutting edge ever:
http://winterequipment.com/sho....p/contractor/v-plow-
Igloo trailmate: https://amzn.to/2UBVYPW
Ego snow blower: https://amzn.to/2C62ya4
Crescent wrench pass through socket set: https://amzn.to/2EjfLh8
Milwaukeetool packout: https://amzn.to/2EfXhy8
Striker trilight: https://amzn.to/2Pxehln
Bosch impact set: https://amzn.to/2LdNb28
3m work tunes: https://amzn.to/2Ee9t2w
Makita Chainsaw: https://amzn.to/2PyDEmU
Dewalt mitre saw: https://amzn.to/2QMndrU

Pergolas are all the rage at the moment, as many of us are spending more time in our gardens; the problem is, they can cost an absolute fortune. We tasked Joe with making one himself to see how much it would cost and to decide, ultimately, is building your own DIY pergola worth it? Time, money and effort factored in. We'll let you be the judge.
On A Budget is a social network for problem solvers and money savers.
Our members help each other to save time and money, offering a safe space to learn and share new ideas, with 10 unique communities including our 2 million strong Facebook group - https://www.facebook.com/group....s/diyonabudgetoffici
Check out our main channels:
Facebook - https://www.facebook.com/onabudgetofficial
Instagram - https://www.instagram.com/onabudgetofficial
Find us online, make an enquiry and read our blog:
https://www.onabudget.tv
AND if you'd like to submit content to have featured on our network, head to:
https://bit.ly/OABSubmissions

Learn how to build a deck from start to finish using all wood materials.
Difficulty Level: Advanced. Make sure you check local building codes. If you are not 100% confident building a deck, Lowe's recommends that you hire a professional. Call 1-877-GO-LOWES or https://low.es/2C2x6Zm to learn more about installation services through Lowe’s.
Full project details on Lowes.com: http://low.es/2k5a1gu
Subscribe to Lowe's YouTube: http://bit.ly/1blLmvD or head to our channel: http://www.youtube.com/Lowes
For more ideas to improve your home, check out Lowe's How-To Library or our other social media channels:
Lowe's - http://www.lowes.com/how-to-library
Facebook - http://www.facebook.com/lowes
Twitter - http://www.twitter.com/lowes
Pinterest - http://www.pinterest.com/lowes
Instagram - http://www.instagram.com/loweshomeimprovement

A partly or fully raised deck can be a great addition to any garden, especially if the ground is sloping or uneven. Learn how to build a raised deck with this step by step guide from our Wickes experts.
Subscribe to the Wickes YouTube channel here: http://po.st/YijIE1
For more Wickes garden and landscaping videos click here: http://po.st/jAXyHE
Planning
The key to a successful deck is in the planning. Avoid very wet areas completely and if the deck is in a shady area be prepared to treat and clean the wood annually. Draw your deck to scale on paper as accurately as you can, remember it's the deck boarding that governs the size of the deck. You should also bear in mind that any deck over 300mm off the ground will require planning permission.
Corner Posts
When digging the holes for your corner posts be sure to look out for any cables or pipes as you go. Once the soil is removed you should be left with a 300mm x 300mm square to a depth of 700mm for each post. Make sure you add a section of concrete block to each hole before adding in the post and Postcrete.
Outer Frame
If your deck is on a slope, start with corner where the deck is highest off the ground and mark on the post where the highest part of the frame will be. To ensure rain water runs off your deck, and away from the house, allow for a slight fall in the level of the deck frame by factoring in a fall of 2mm for every metre.
Centre post and Support Joists
Your support joists should run in the same direction as your deck boards. Sandwich the centre post between two support joists before securing with Postcrete. Trim your post by using a setsquare and a handsaw making sure you treat the cut ends as you go. When laying your landscape fabric it's best to overlap the fabric to ensure it covers all of the area under your deck.
Steps
Your steps should be supported on solid and level ground. When building your stairs you will also need to make sure they are flush with both the top and side of your frame. When securing your deck boards to the steps, always secure the front faces of the steps first.
Deck Boards
When securing deck boards we'd recommend drilling all fixing points with a 2mm bit to prevent them from splitting, also, if you countersink all drilled fixing points you will get a smoother finish. Keep spaces even between adjacent boards by using a spacer from an off cut of timber (we'd recommend a gap of 5-8mm to allow the timber to expand and contract).
Fascia Boards
Start by attaching all the boards that do not need to be cut down, with 64mm screws. If you are adding an angled board because the decking is being built on a slope you will need to add packers to the deck frame. Remember to also leave a gap of at least 5mm between the board and the ground as you do not want it touching the ground at any point.
Shop Wickes timber & decking here: http://po.st/g2MrrC
Shop power tools at Wickes here: http://po.st/ClXSl7
Learn how to assemble deck railings on YouTube here: http://po.st/ZicwVL
For more advice on how to lay a deck visit our website here: http://www.wickes.co.uk/how-to-guides/lay-a-deck
For more information and advice on gardens and landscaping visit the Wickes website here: http://www.wickes.co.uk/garden
Subscribe to the Wickes YouTube channel here: http://bit.ly/1WHJIIr
In addition to our video, we recommend you read our 'How To Guide - How to create storage space'. Use this guide to find out how to choose and calculate your materials, tools and safety equipment. http://www.wickes.co.uk/how-to-guides...
For more tips and general advice on how to do it yourself from Wickes, you can visit;
Wickes Website: http://www.wickes.co.uk/
Wickes Facebook: https://www.facebook.com/Wickes.co.uk
Wickes Twitter: https://twitter.com/Wickes
Wickes Google+: https://plus.google.com/1153898122995...
Wickes YouTube channel: https://www.youtube.com/user/wickesvideo

Watch our step-by-step video showing how to build a shed, with expert advice and top tips to help you complete the job with confidence.
Visit the official B&Q YouTube channel. Here you'll find the ideas and know-how you need to make your home improvement dream a reality: http://www.youtube.com/bandq
Need a helping hand with your DIY project? We're always uploading new videos, so whatever your project, we're here to support you 24/7. Subscribe today so you don't miss out. http://www.youtube.com/subscri....ption_center?add_use
Buying in bulk? Let us get it to your door.
For more advice go to http://www.diy.com/advice
To shop at B&Q go to http://www.diy.com
Join the B&Q Club for exclusive offers: http://www.diy.com/club
Like us on Facebook: http://www.facebook.com/bandq
Follow us on Twitter: http://www.twitter.com/bandq
Be inspired on Pinterest: http://www.pinterest.com/bandq
Find new ideas on Instagram: http://www.instagram.com/bandq_uk


Building a shed is easier than you think. Today we're going to build a solid 8x10 shed floor using only a few tools.
Plans - https://jessedoesdiy.etsy.com
Check out the other videos in the shed build:
Part 2 | Walls - https://youtu.be/ijl4ZThbDBg
Part 3 | Door - https://youtu.be/L69VQZ-O9BY
Part 4 | Roof - https://youtu.be/lK0g1-EZhAY
Part 5 | Finishing - https://youtu.be/OJskibe8CFk
Help support the channel and the things I can show by using the links below, it costs nothing to use them, but helps me out so I can help you!
- Tools/Materials Used (affiliate)
For Canadian buyers:
4' level - https://amzn.to/3guAuSy
Tape measure - https://amzn.to/3tD2Zkw
Square - https://amzn.to/3n9FSvn
Angle brackets - https://amzn.to/3dD8IRN
For USA buyers:
4' level - https://amzn.to/2QH8TTa
Tape measure - https://amzn.to/3tGwnpY
Square - https://amzn.to/32A05Bg
Angle brackets - https://amzn.to/2QojxOX
**************************************
Jesse Does DIY links:
🛠Email: jessedoesdiy@gmail.com
🛠Project Plans: https://jessedoesdiy.etsy.com
🛠Instagram: https://www.instagram.com/canadiyan_jesse/?hl=en
🛠Instructables: https://www.instructables.com/....member/Jesse+does+DI
Other Channel with Slade:
https://www.youtube.com/channe....l/UC-qQtqcjoWHbNn9Kg

And that's not to mention toes. What a feet of engineering they are.
Books what I wrote, yo ► https://tinyurl.com/ycnl5bo3
Discord server ► https://discord.gg/76ybBSR (just in case that doesn’t work: discord.gg/exurb1a)
I also make horrendous music ► https://soundcloud.com/exurbia-1
Facebook ► https://www.facebook.com/exurb1a/
Help me to do this full-time, if you're deranged enough ► https://www.patreon.com/exurb1r?ty=h
Special thanks to: Biology, evolution, Darwin, and the prehistoric extraterrestrial engineers.
Music ► Dance Commander Franz von Suppé - Light Cavalry Overture: https://youtu.be/aF5nhMIyeqI

A ground-level floating deck (or detached deck) is a great way to add entertaining space to your backyard. We'll walk you through each step, from planning & framing, to installing deck boards & decorating.
Difficulty Level: Advanced. Make sure you check local building codes. If you are not 100% confident building a deck, Lowe's recommends that you hire a professional. Call 1-877-GO-LOWES or https://low.es/2C2x6Zm to learn more about installation services through Lowe’s.
Products used:
Deck blocks - https://low.es/2Lj4zWq
2x6 joists - https://low.es/40gxdcs
Paver base - https://low.es/2Y5i2a4
Joist hangers - https://low.es/3L9eyLK
1.5" joist hanger nails - https://low.es/40i6494
Double joist hangers - https://low.es/3UFrnjW
Deck anchor - https://low.es/2xNa3zS
Trex deck boards - https://low.es/30FnfmX
Trex fascia boards - https://low.es/2NQkFc0
Hidden deck clips - https://low.es/32ocEhA
Composite deck screws - https://low.es/2YMjWcS
Waterproof tape - https://low.es/43CIJ4Z
Wire mesh - https://low.es/2G8ifza
Pneumatic palm nailer - https://low.es/3on0JQx
DeWalt planer - https://low.es/2Go4Hjp
Bosch router - https://low.es/2LS4JDE
Slot cutter - https://low.es/2NSs2ji
Slot cutting arbor - https://low.es/2XYqGal
Decor:
Dining table - https://low.es/2JGosTV
Dining chair - https://low.es/2XQEhwA
Post light - https://low.es/2JDHxpZ
Lanterns - https://low.es/2JxoZsk
String lights - https://low.es/2XINADg
Wood planter boxes - https://low.es/2SelpGE
Outdoor rug - https://low.es/2xNbjmp
Hanging basket - https://low.es/2XHQIzf
Watch Subscribe to Lowe's YouTube: http://bit.ly/1blLmvD or head to our channel: http://www.youtube.com/Lowes
For more ideas to improve your home, check out Lowe's How-To Library or our other social media channels:
Lowe's - http://www.lowes.com/how-to-library
Facebook - http://www.facebook.com/lowes
Twitter - http://www.twitter.com/lowes
Pinterest - http://www.pinterest.com/lowes
Instagram - http://www.instagram.com/loweshomeimprovement

Putting together and maintaining your skateboard is a rewarding and therapeutic task. It helps you understand the function of each part and how to adjust them to keep your skateboard in shape. We're going to quickly show you how to build a skateboard part by part and give you a few pointers to make it smooth and easy.
And if it seems too daunting, we're still glad to build it for you! https://www.tactics.com/skateboardbuilder?cp=ytd
Check out all our Skate Gear at Tactics: https://www.tactics.com/skate?cp=ytd
Watch more How-To videos from Tactics Boardshop: https://www.youtube.com/playli....st?list=PLC7EE617187
Like, follow, and stay up to date with Tactics...
Shop - https://www.tactics.com
Instagram - https://instagram.com/tactics
TikTok - https://www.tiktok.com/@tactics_official
Facebook - https://www.facebook.com/tacticsFB
Twitter - https://twitter.com/tactics
Threads - https://www.threads.net/@tactics
Blog - https://www.tactics.com/blog

HOMEBUILDING & RENOVATING
Homebuilding.co.uk
For more self build guides, advice and inspiration, visit https://www.homebuilding.co.uk/
In this video, Mat Woodyatt, Training Manager at Redland Roofing demonstrates how to put together a full metric roofing system.
Follow onscreen instructions to skip to selected chapters